Sustainability 101: Animal Processing
Government Nuisance Trapping Part VII

As mentioned in my last post, the real hard work actually began AFTER I had caught the large fifty pound beaver who had been damming up our towns fish ladder… And because I get asked quite often about how to process animals, I am going to take the opportunity to show a step-by-step journey into everything that goes into processing an animal for meat, fur, and leather.
I will start out by saying that this is a very graphic post. If you are squeamish, don’t like blood, or otherwise anthropomorphize things… then consider this a warning to click out of this tab and go about your day.
If you are still interested, buckle up for the picture journey of what it takes to process one large beaver.
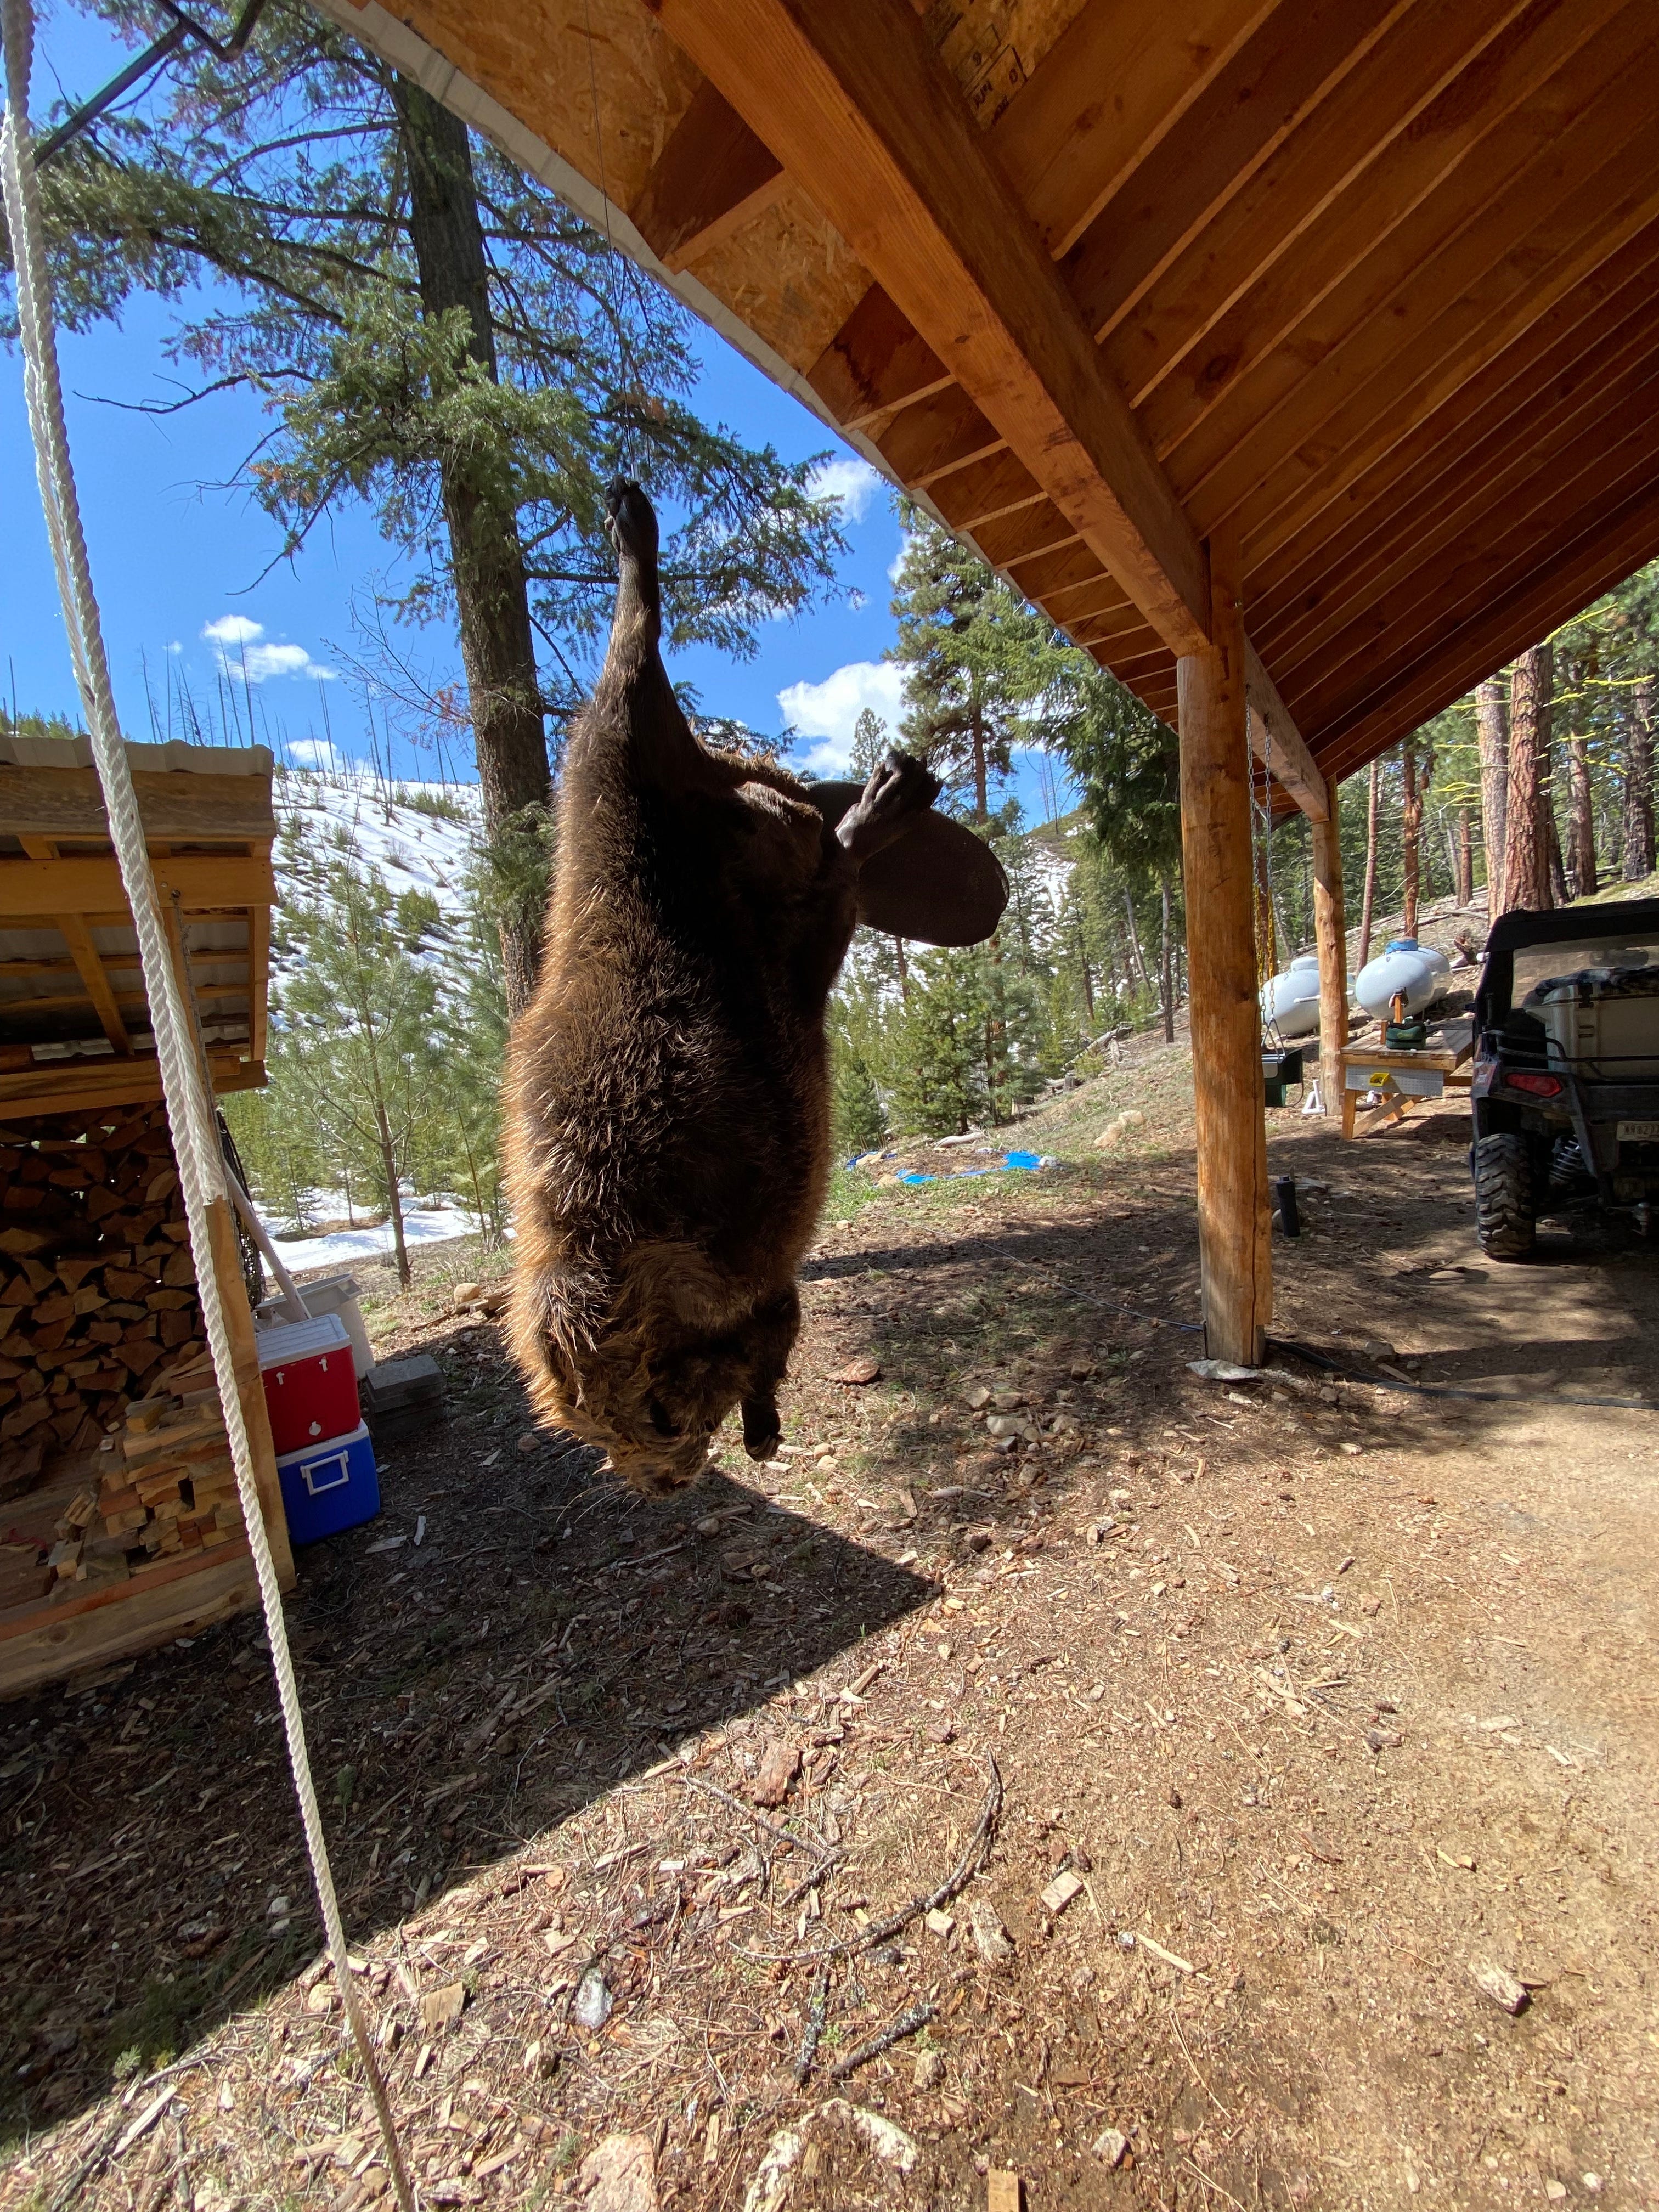
BRUSH OUT YOUR BEAVER: Jokes aside, the first step in ensuring that you are properly caring for the pelt you are about to remove is to hang your beaver and thoroughly brush it out to remove any debris or cockleburs (This holds true for any animal you skin, including coyotes, foxes, and wolves). This will ensure that when you get to the later step of fleshing, that you do not accidentally rip a hole in your hide.

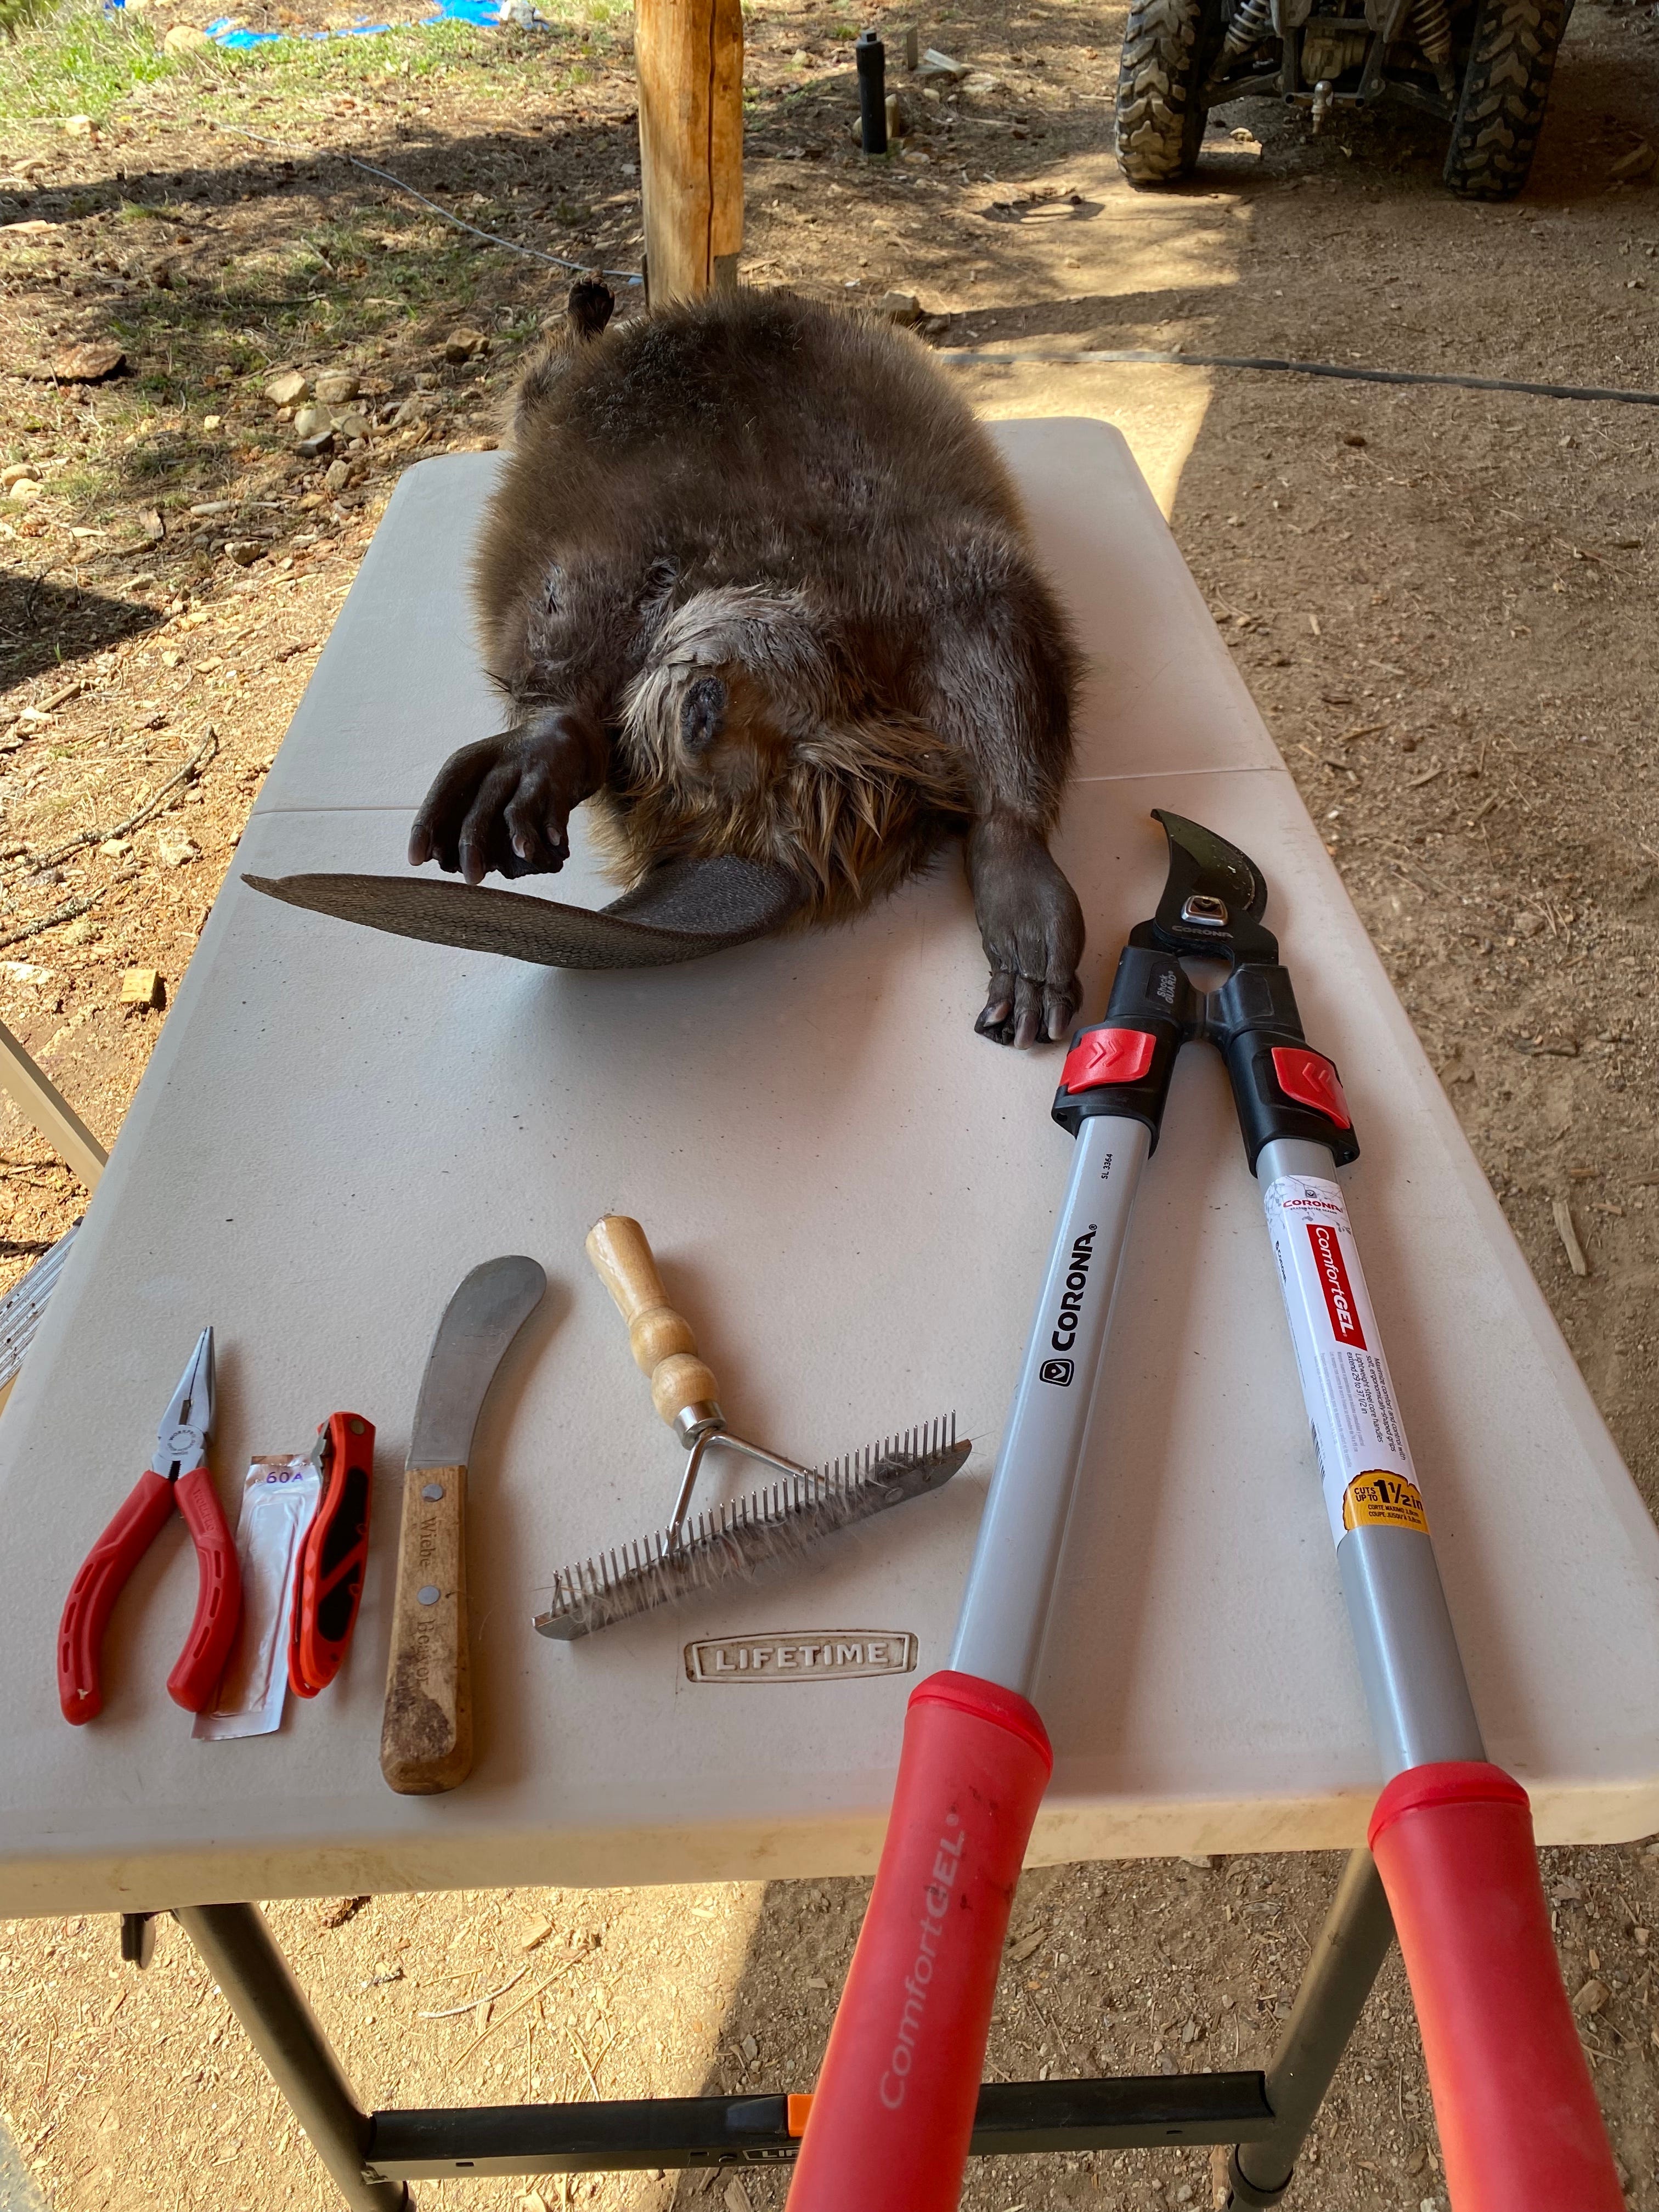
Beaver hung and ready to be brushed out. PREPARE A CLEAN PLACE TO DO THE DIRTY WORK: I personally keep a few folding tables handy for whenever I need to do extensive knife work that doesn’t involve tubing the animal like a sock. Also, get all of your tools ready. For this job, I had some garden sheers, my havalon knife, a pair of pliers (for removing dull havalon blades), a beaver knife, and my brush.

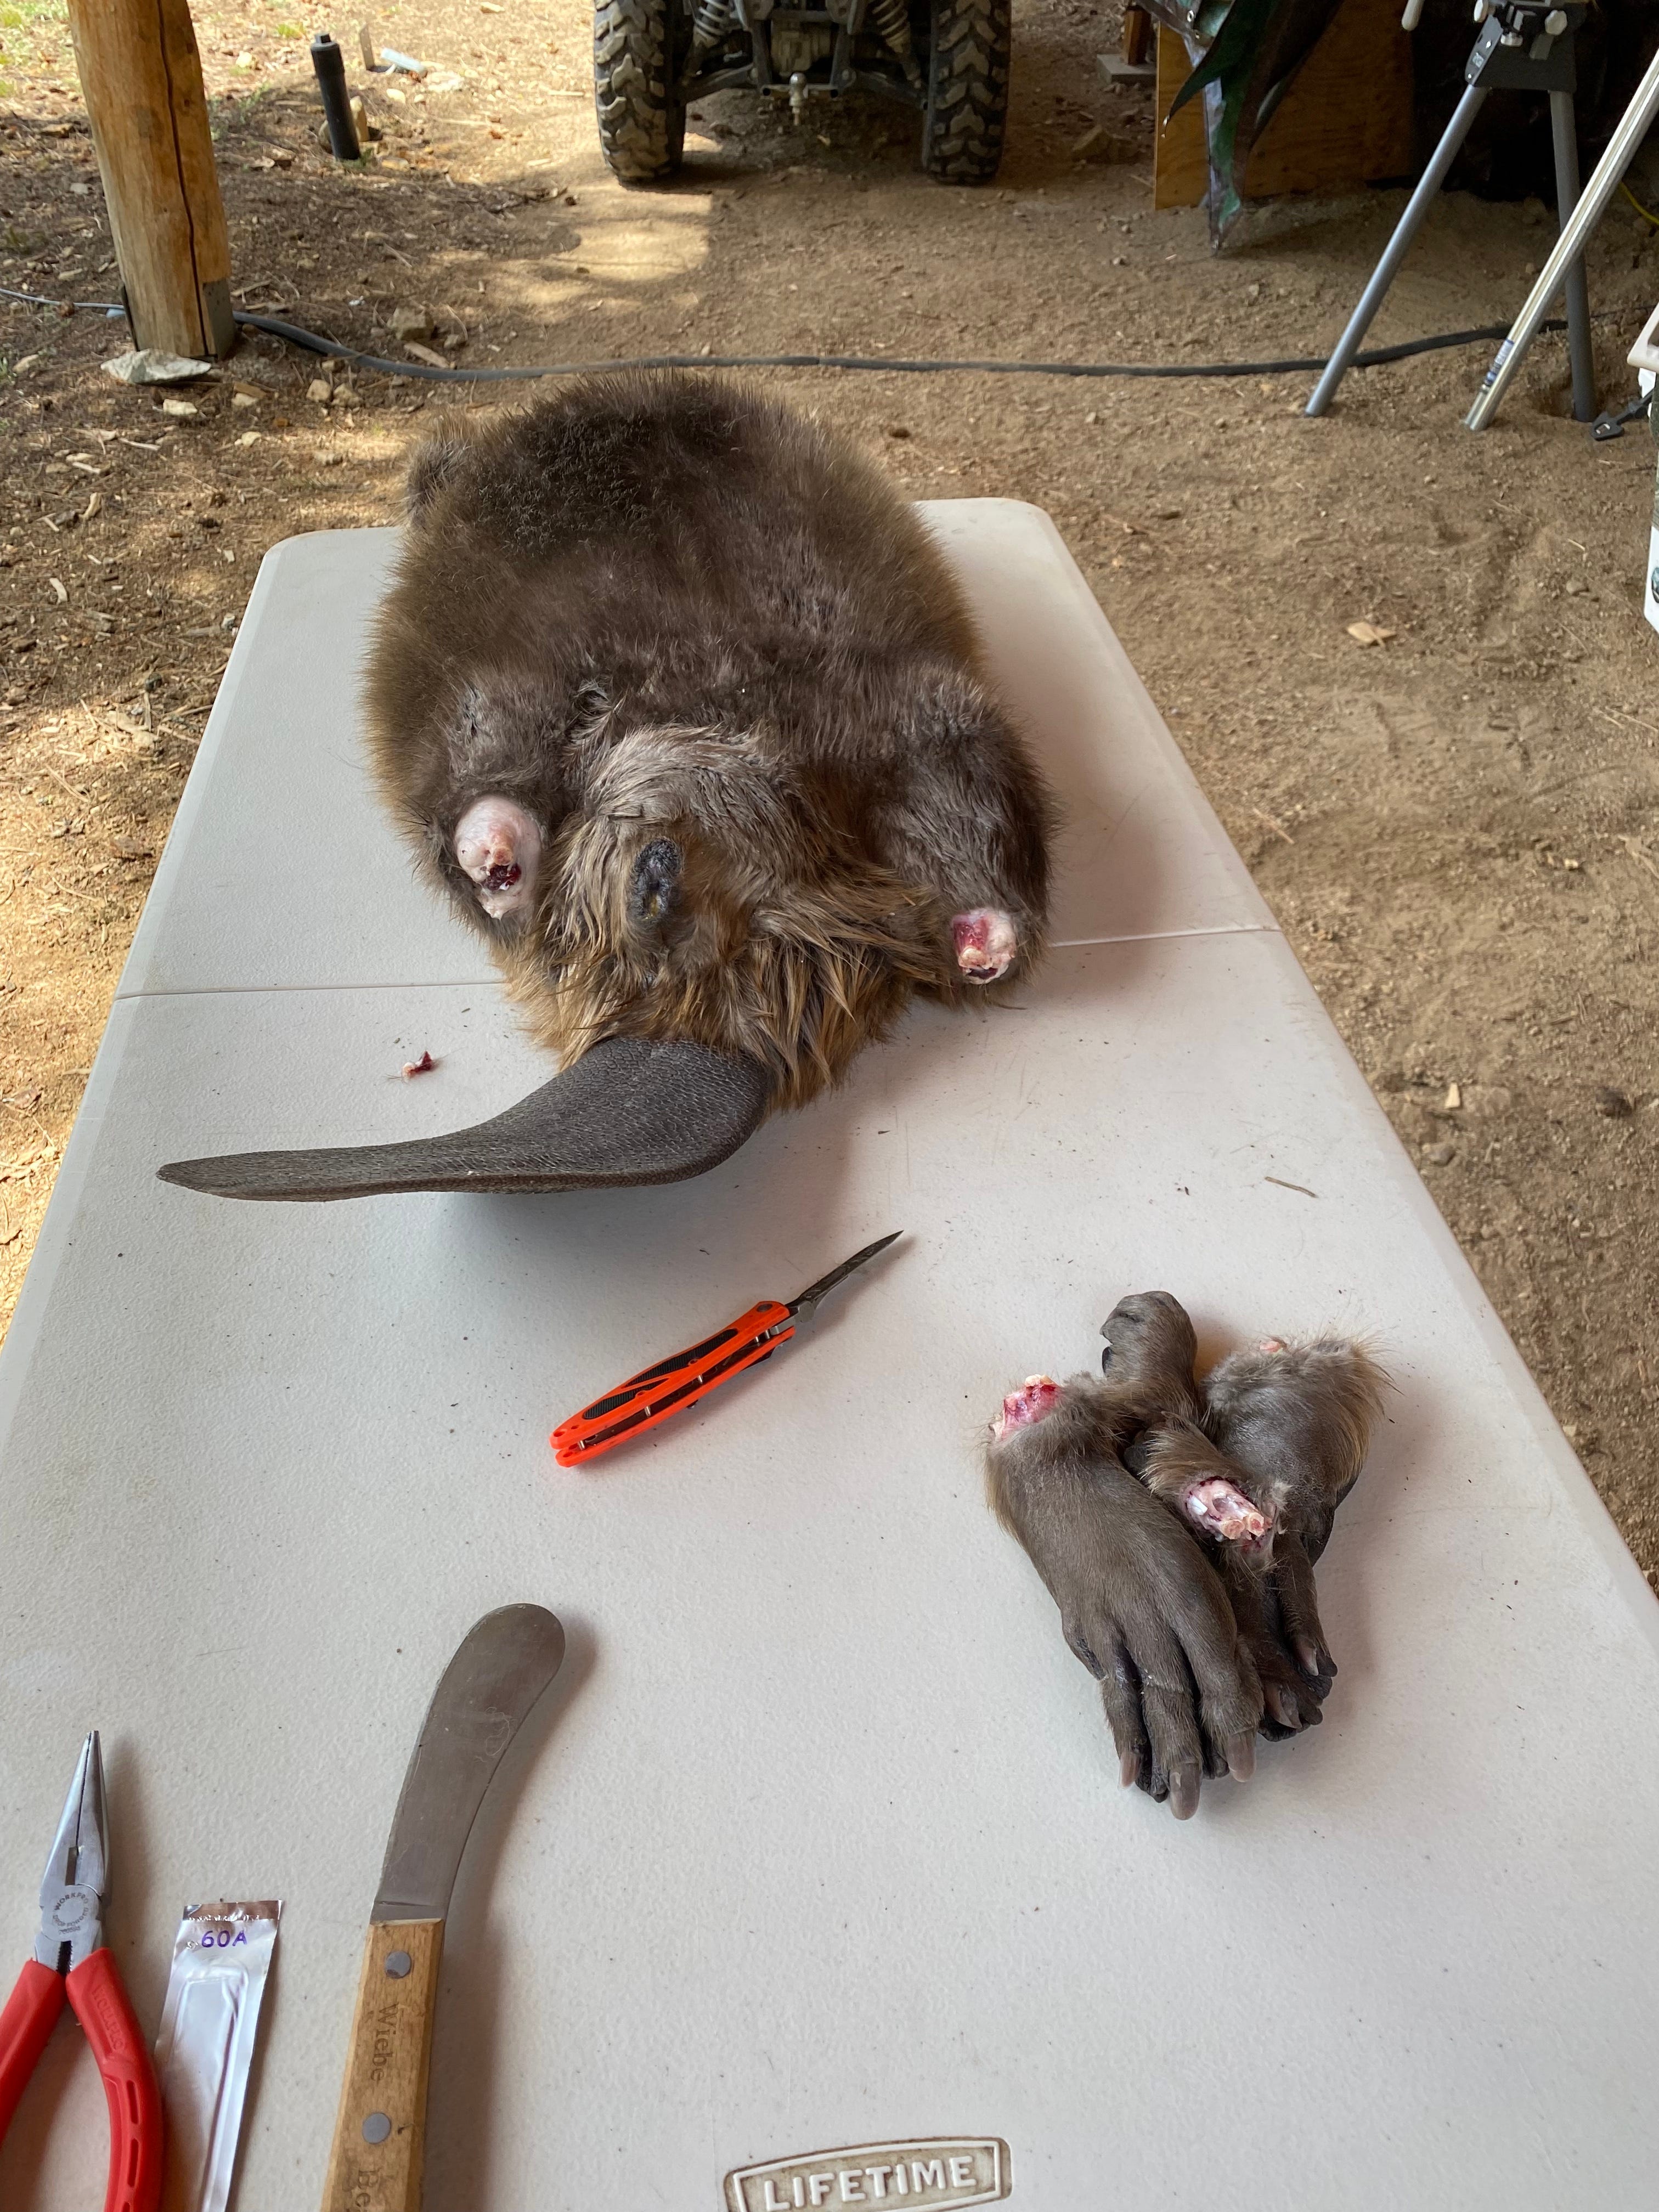
All of the tools needed are ready to go. (I also only now realize I have ‘corona’ brand garden sheers) CUT OFF THE FEET: The first thing that we have to do is take our garden sheers and lop off all four of the beaver’s feet. You will find it easier if you cut right behind the elbow and go through tendon instead of bone. Also, if you are a first-timer, don’t be surprised when you see the claws retract… the first time can scare the crap out of you when you see the hand articulate as if the animal were still living.

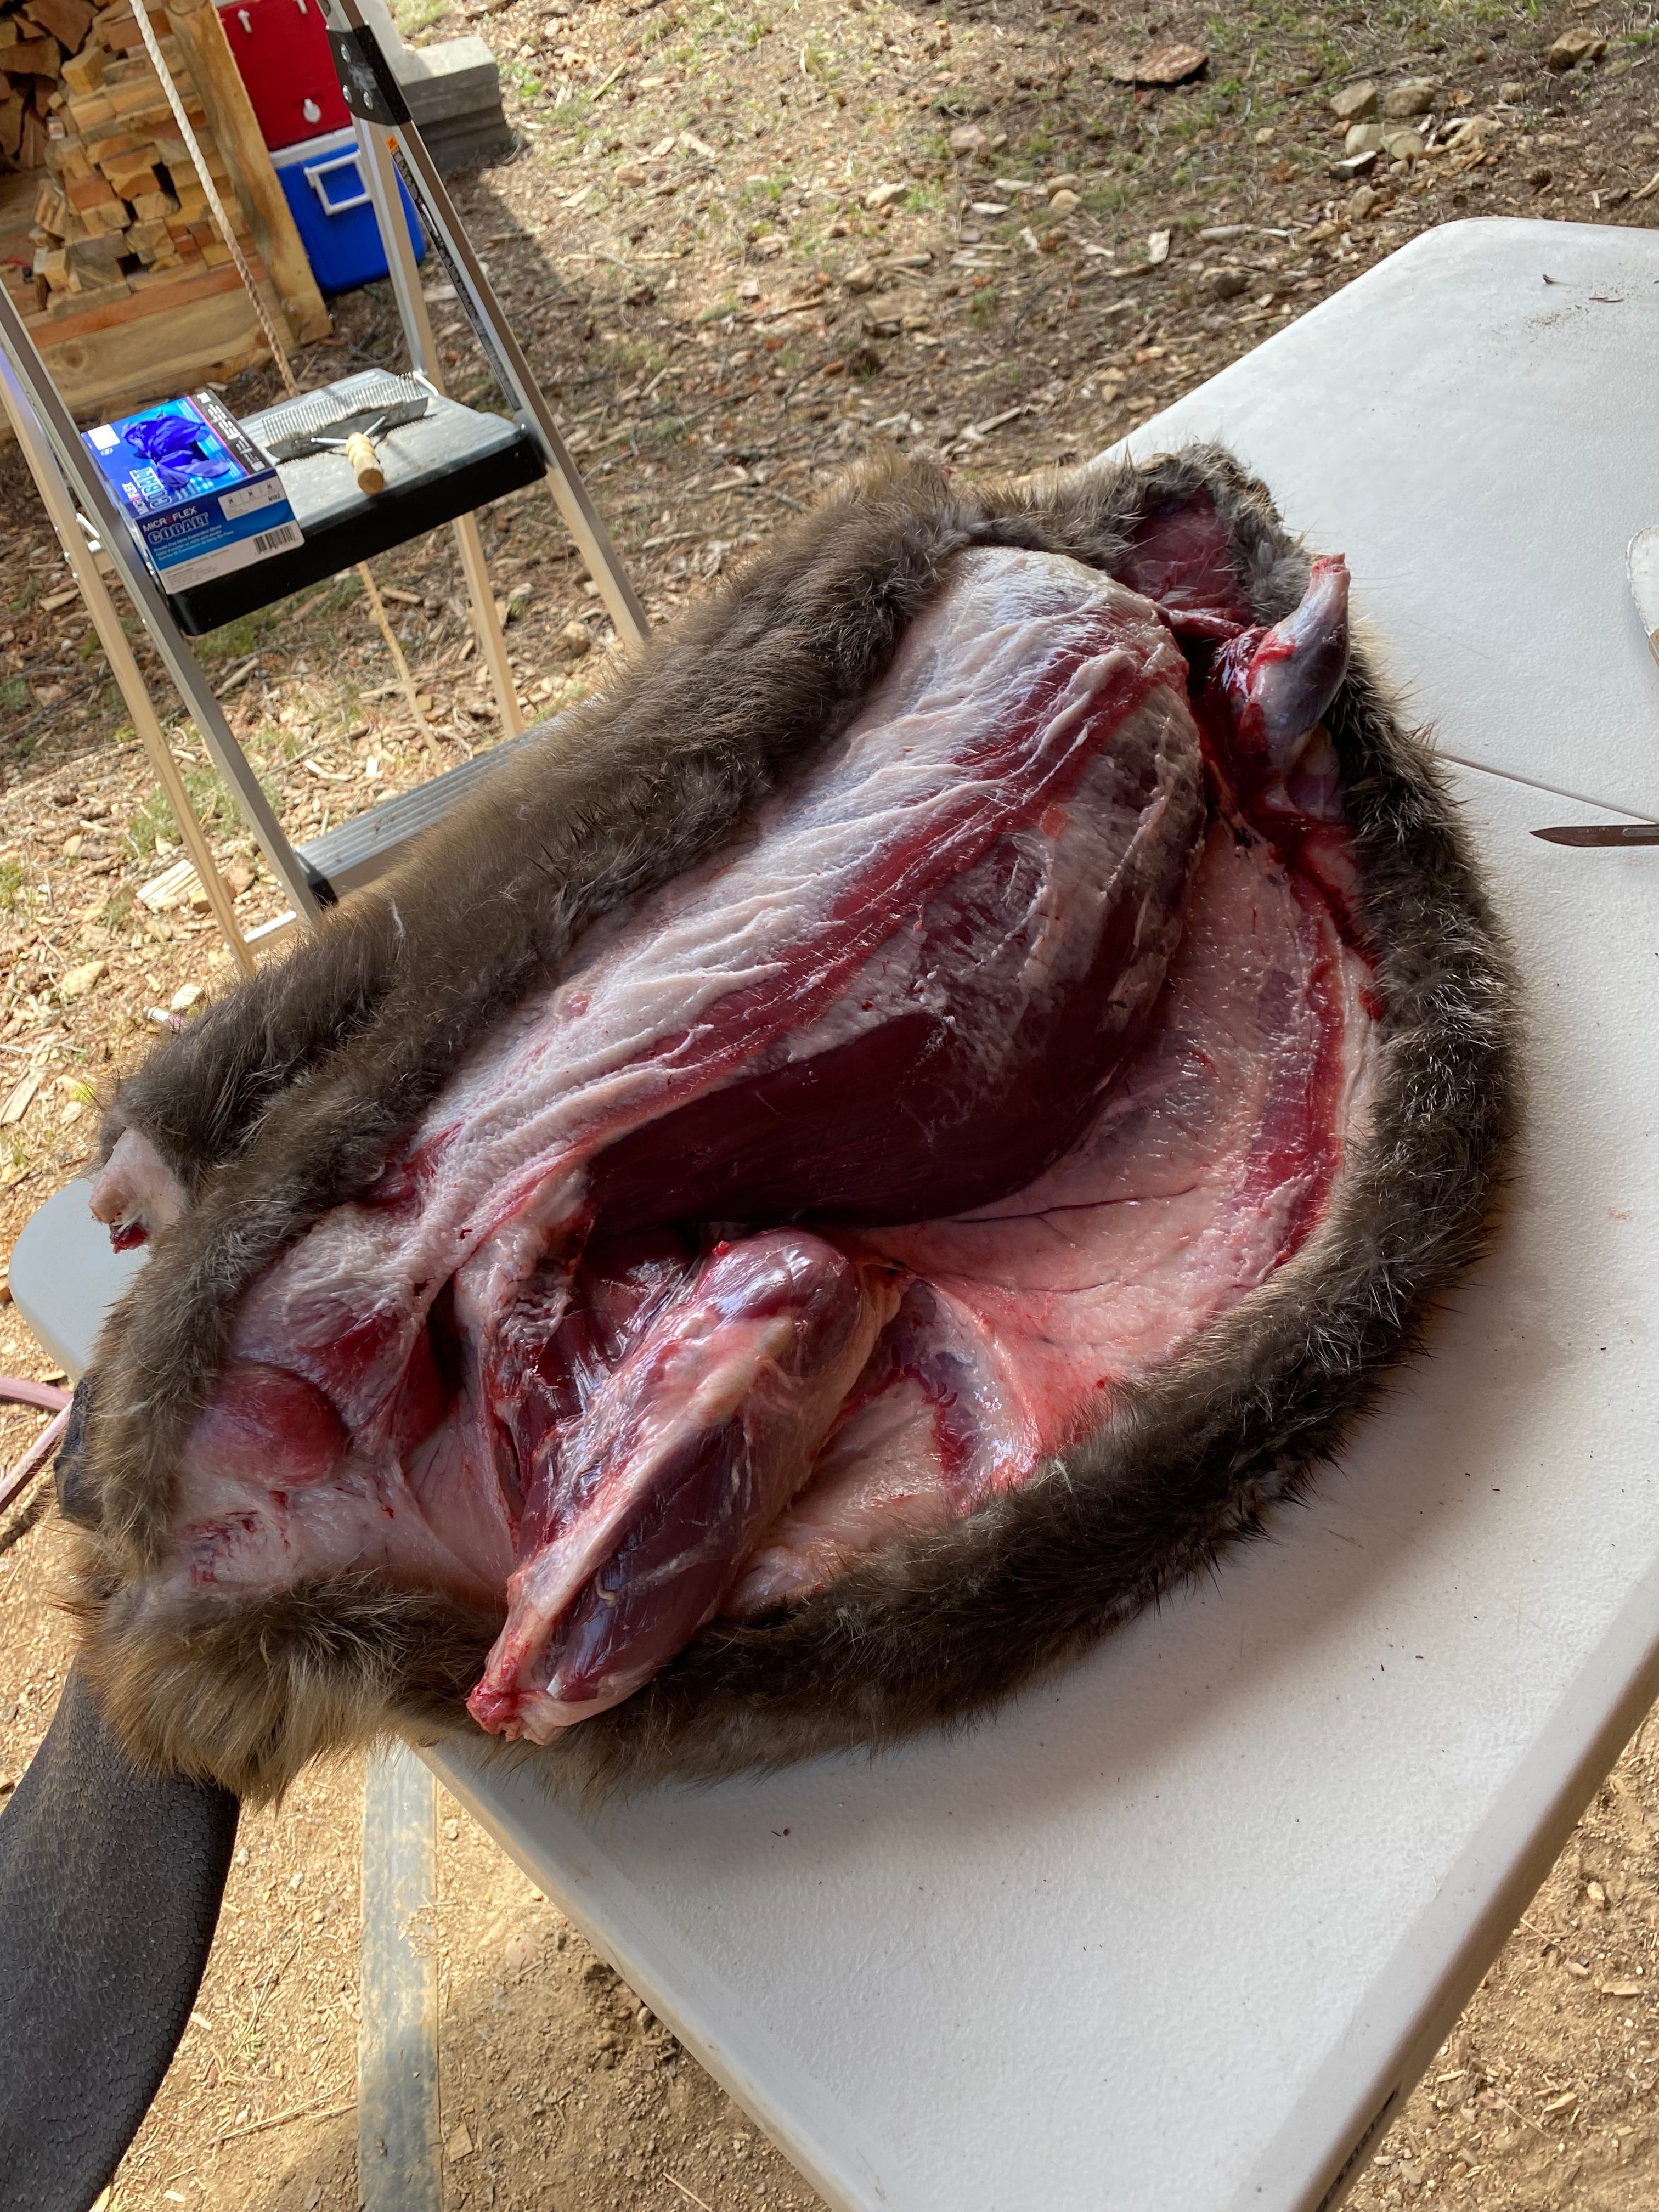
All four feet removed. DRAW YOUR CUT LINE: For beaver, we will be making one long incision from the base of the tail (below the vent… aka anus), around the vent, and all the way up to beaver’s lower jaw. To ensure that we make a good even cut, I like to take my finger and draw a line in the beaver’s fur for me to follow. When you start your cut, it’s important to not cut too deeply, as you DO NOT want to perforate the internal organs…

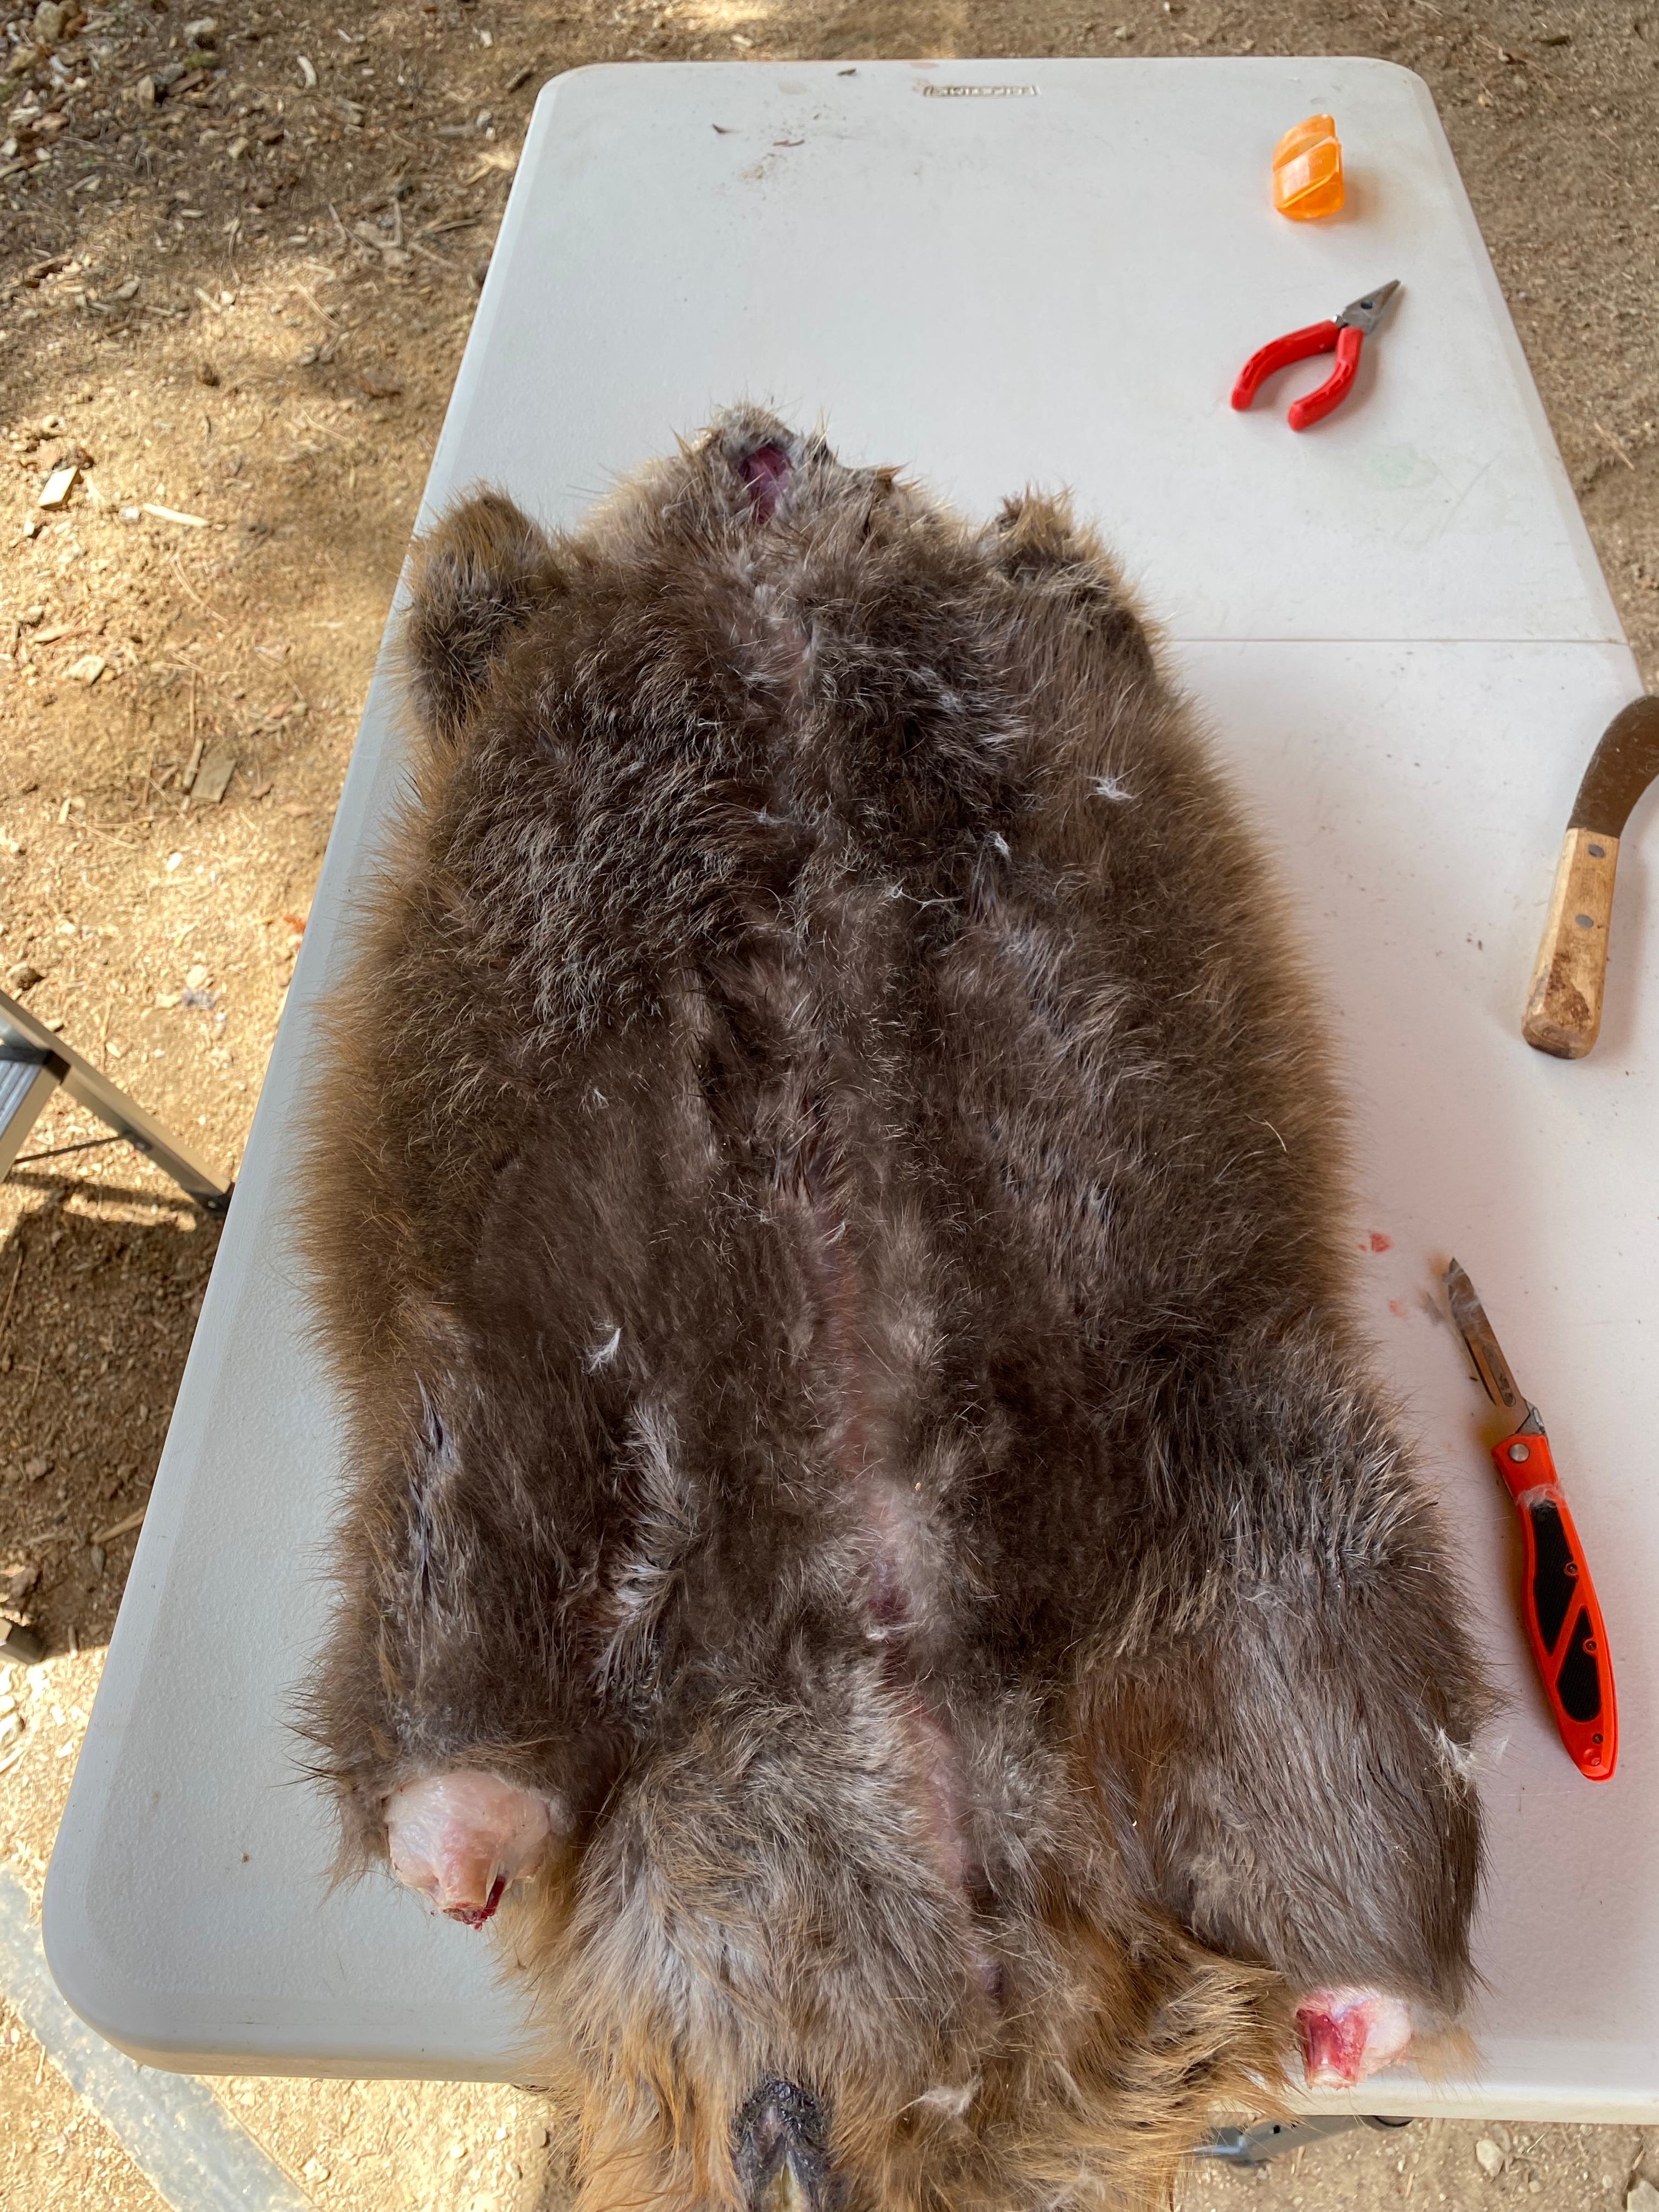
Center line drawn into the fur with my finger. GO SLOW TO GO FAST: Once you start your cut and make it all the way up to the chin of the beaver with your havalon, you can switch to your slightly duller and curved beaver knife. Pick one side (in my case it was the right side if you are looking at the beaver from its tail end), take a hand full of fur, and begin to pull it taught. You will see connective tissue getting stretched out and you delicately begin to remove it with your beaver knife. With every tug and cut, you should feel the hide loosening away from the meat. A pro-tip is to make sure that you always angle your blade towards the meat so that way if you make a bad cut, you won’t be in jeopardy of putting a hole into the pelt. The only thing left to do is work as far down towards the spine as you can. (SIDE NOTE: Removing the skin around the forearms and thighs can be difficult… take advantage of services like youtube for some of the more intricate cuts)

First half done. RINSE & REPEAT: Once you are done with the first half, it’s time to repeat your magic on the next side. One quick aside is that when you are cutting around the vent, you should be careful to not puncture the meat in this area. The beaver’s castoreum glands can be quite full and getting the oil on the meat can taint it as far as keeping good table fare is concerned. (The castoreum gland oil has historically been used in perfumes and has an oddly satisfying scent… It is currently the most profitable part of harvesting beavers if you resell it for lure making)

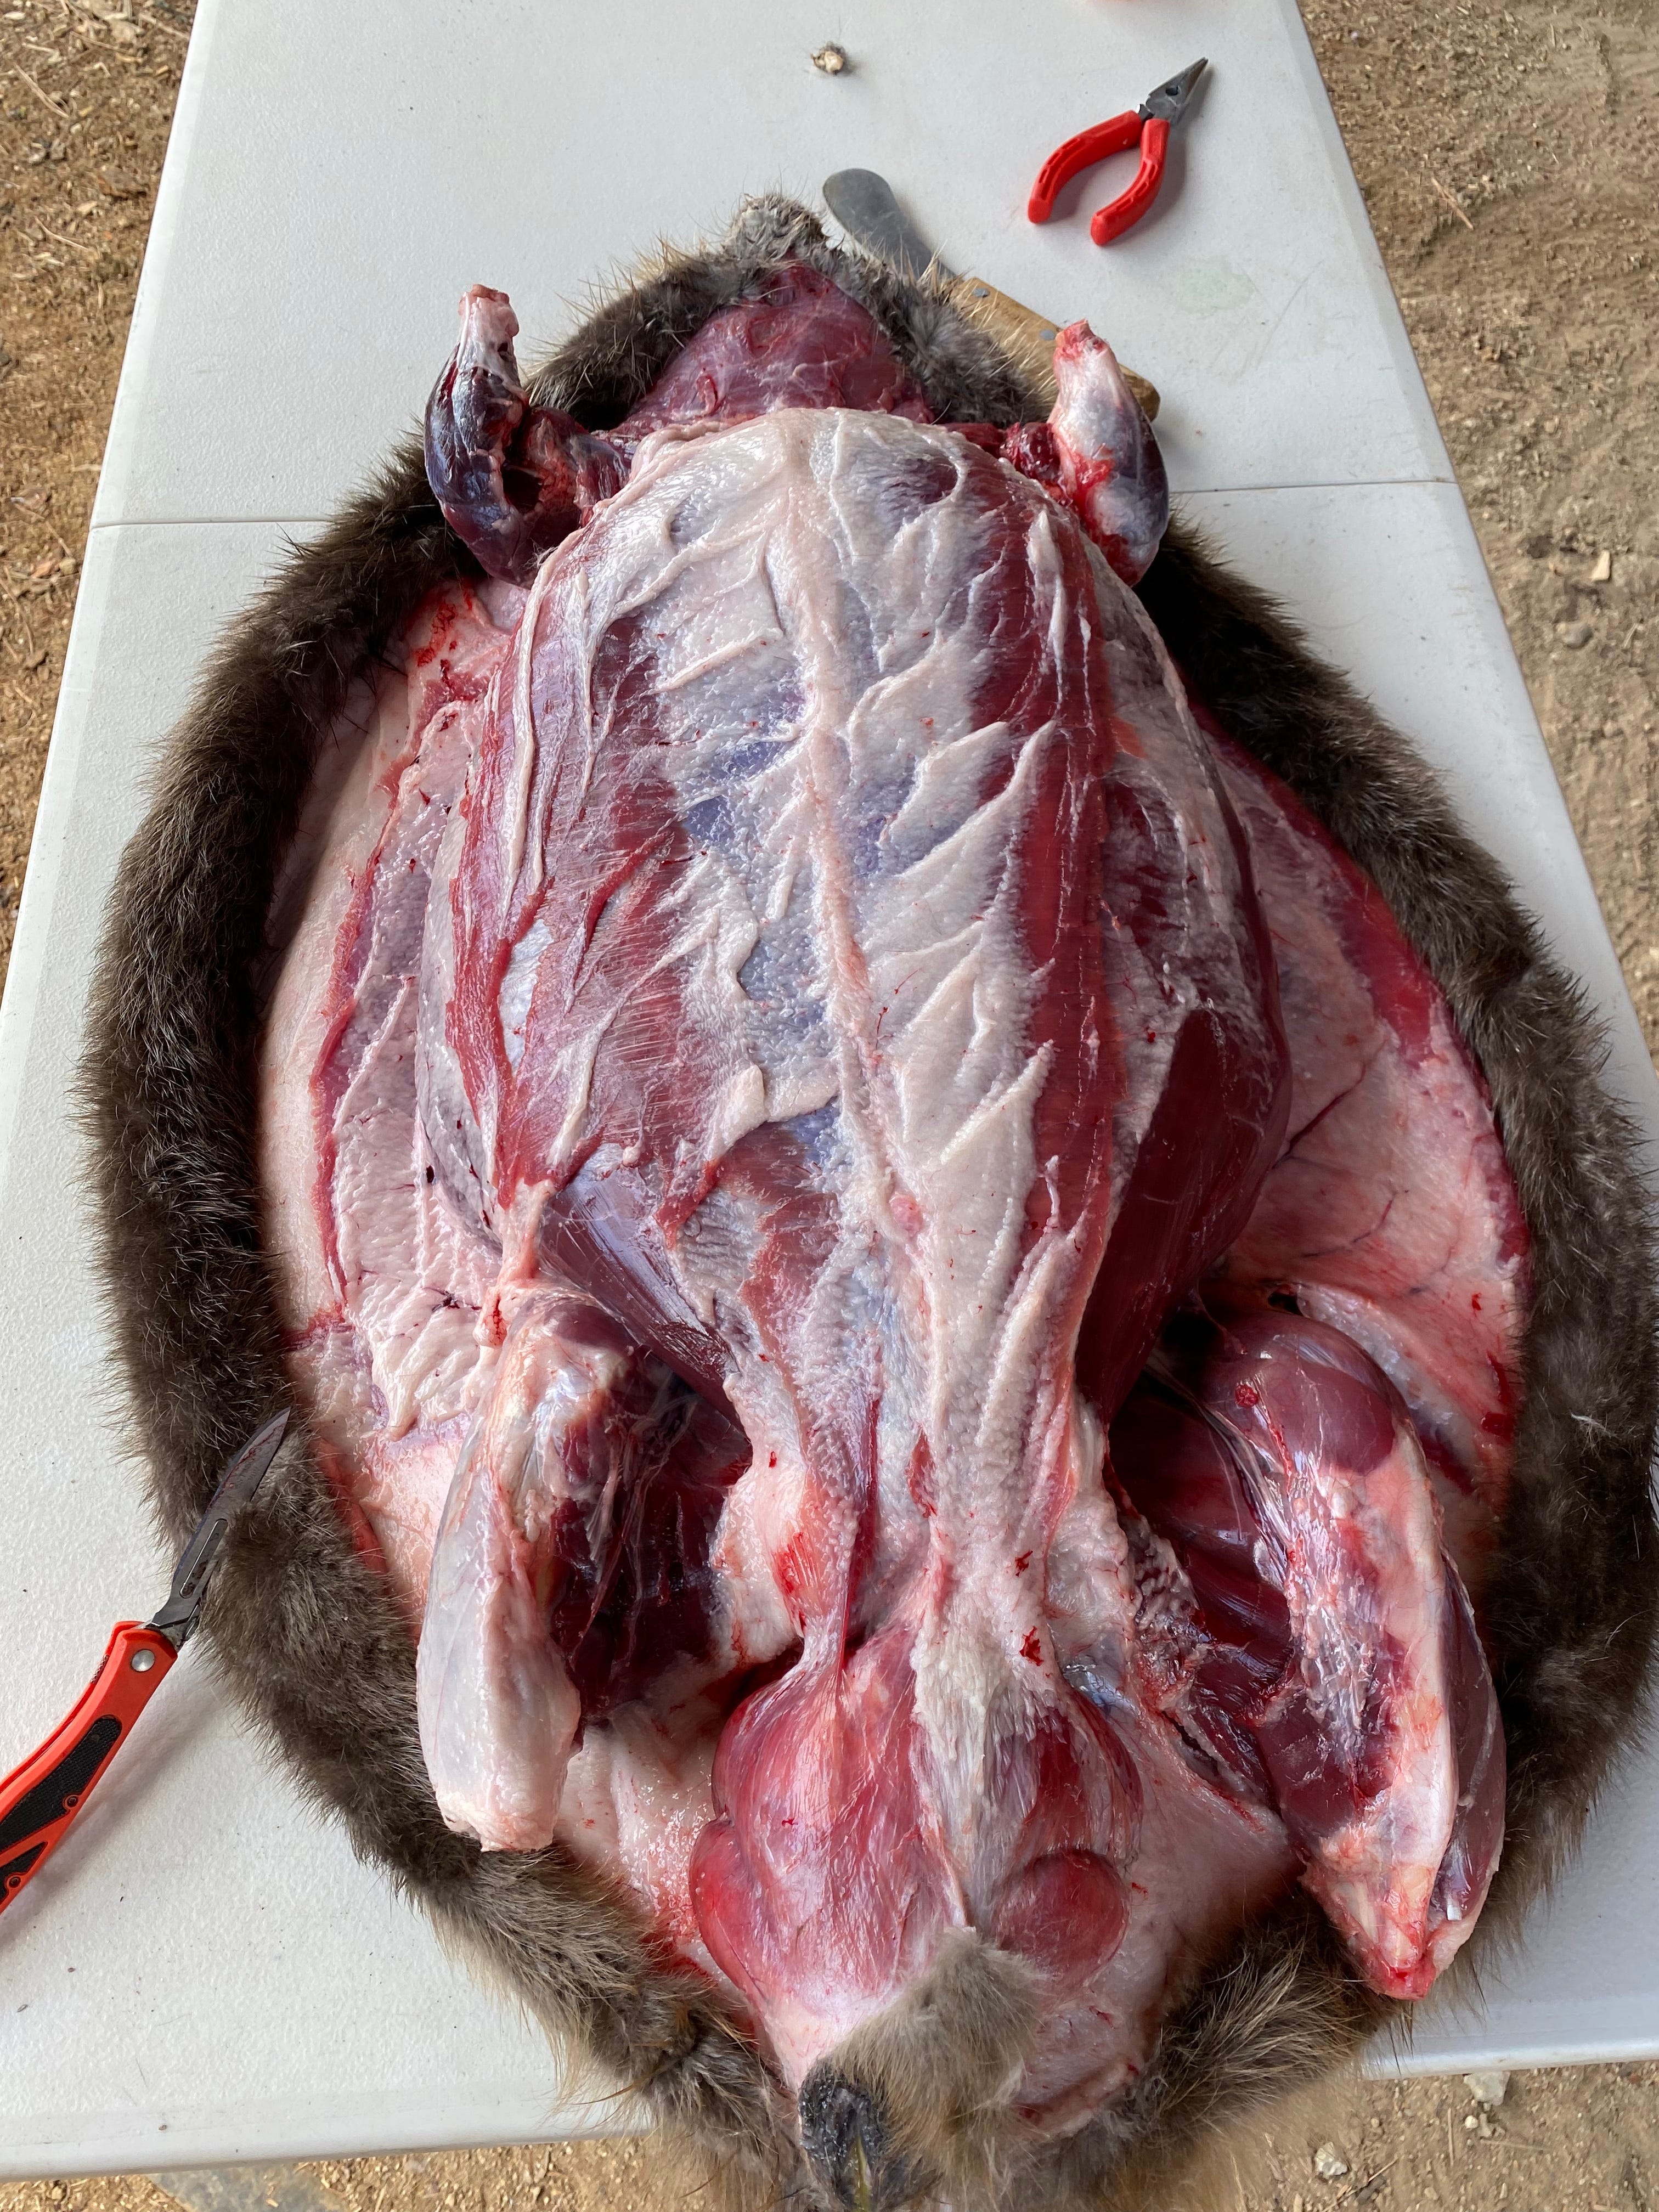
3/4 of the way there! FLIP & PULL: With the underside removed from the carcass, it is time to flip the beaver and start working up the spine. If you did a sufficient job on steps 5 & 6, this should be pretty easy — Just pull hard and use your knife to remove any connective tissue and meat. Continue this all the way up until you get to the back of the beaver’s skull.

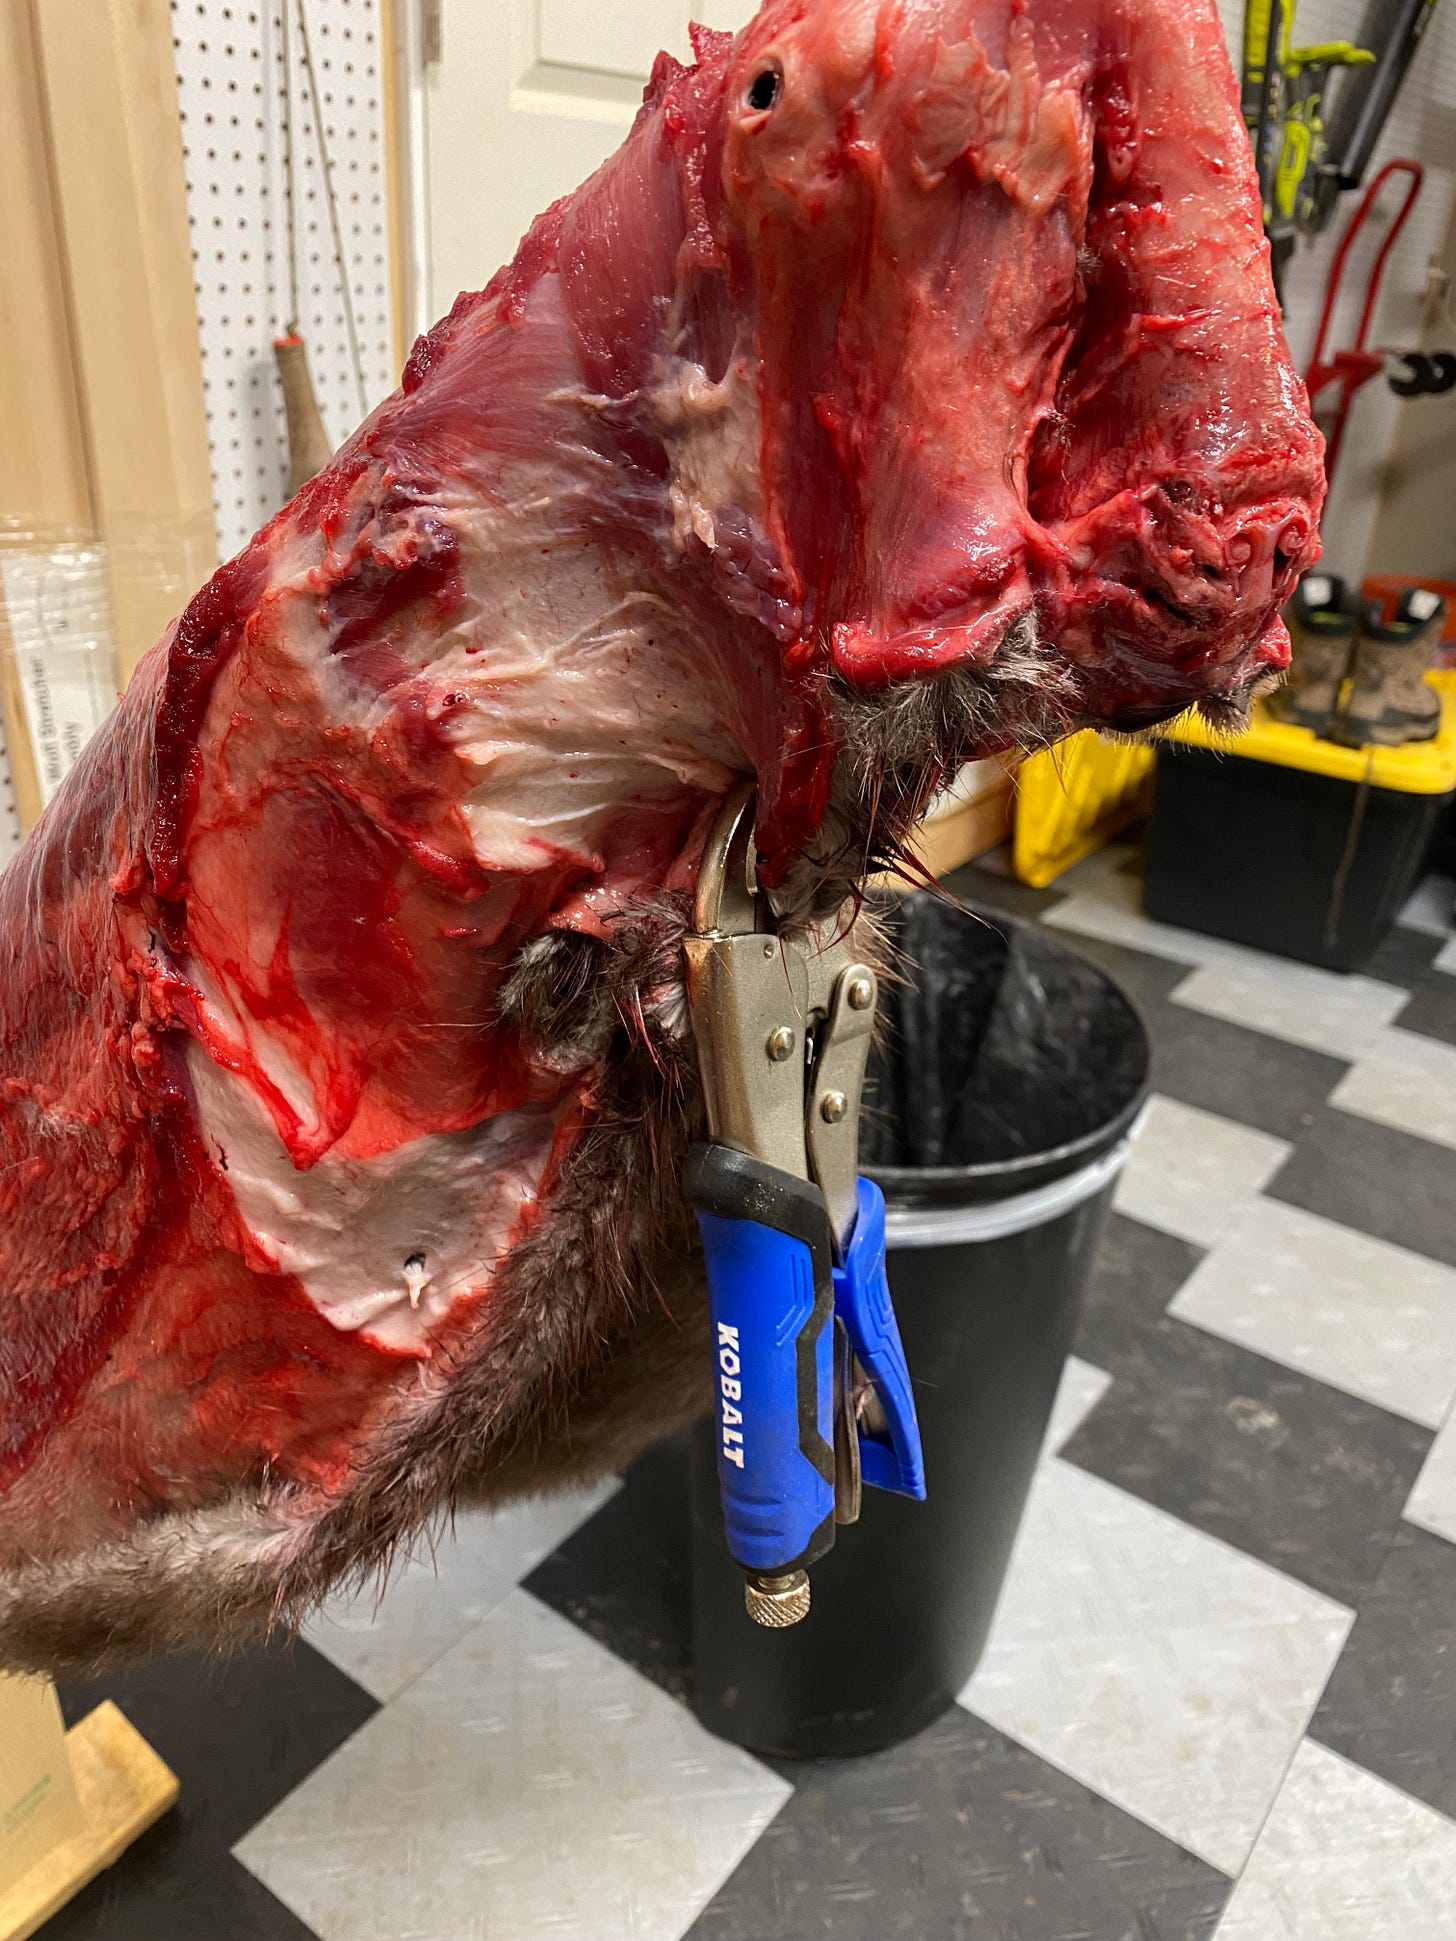
Working the hide up the spine. PULL THE SHIRT OVER THE HEAD: The last part before removing the hide is to cut the delicate parts around the skull. To get started, pull the loose hide up and over the skull as if it were a shirt and you were trying to pull it over the beaver’s head. Hang some of the loose (and heavy) fur off the end of your table to let gravity help in cutting loose the connective tissue.
The one thing to note here is that you need to understand animal anatomy pretty well — In order to cut the holes for the eyes, ears, and nose you need to know where they are in relation to what you are cutting. Sadly, this can only come with practice. Trust me when I say that my first skinning attempts on multiple animals were less than ideal… many of my furs looked like cartoon characters with oversized eye-holes.

Use the hide as a natural weigh to give you the tension you need. REMOVE THE TAIL: With the hide now free of the carcass, you can set it aside for now. While the meat is still good, it is time to process the rest of the animal. Using your garden sheers, cut right at the fur line of the tail in one straight line. The tail should detach pretty easily if you cut right between one of the vertebrae that extends into the tail. Normally I would split the tail and remove the fat, but on this day I ended up putting it in the freezer to fully process at a later date.

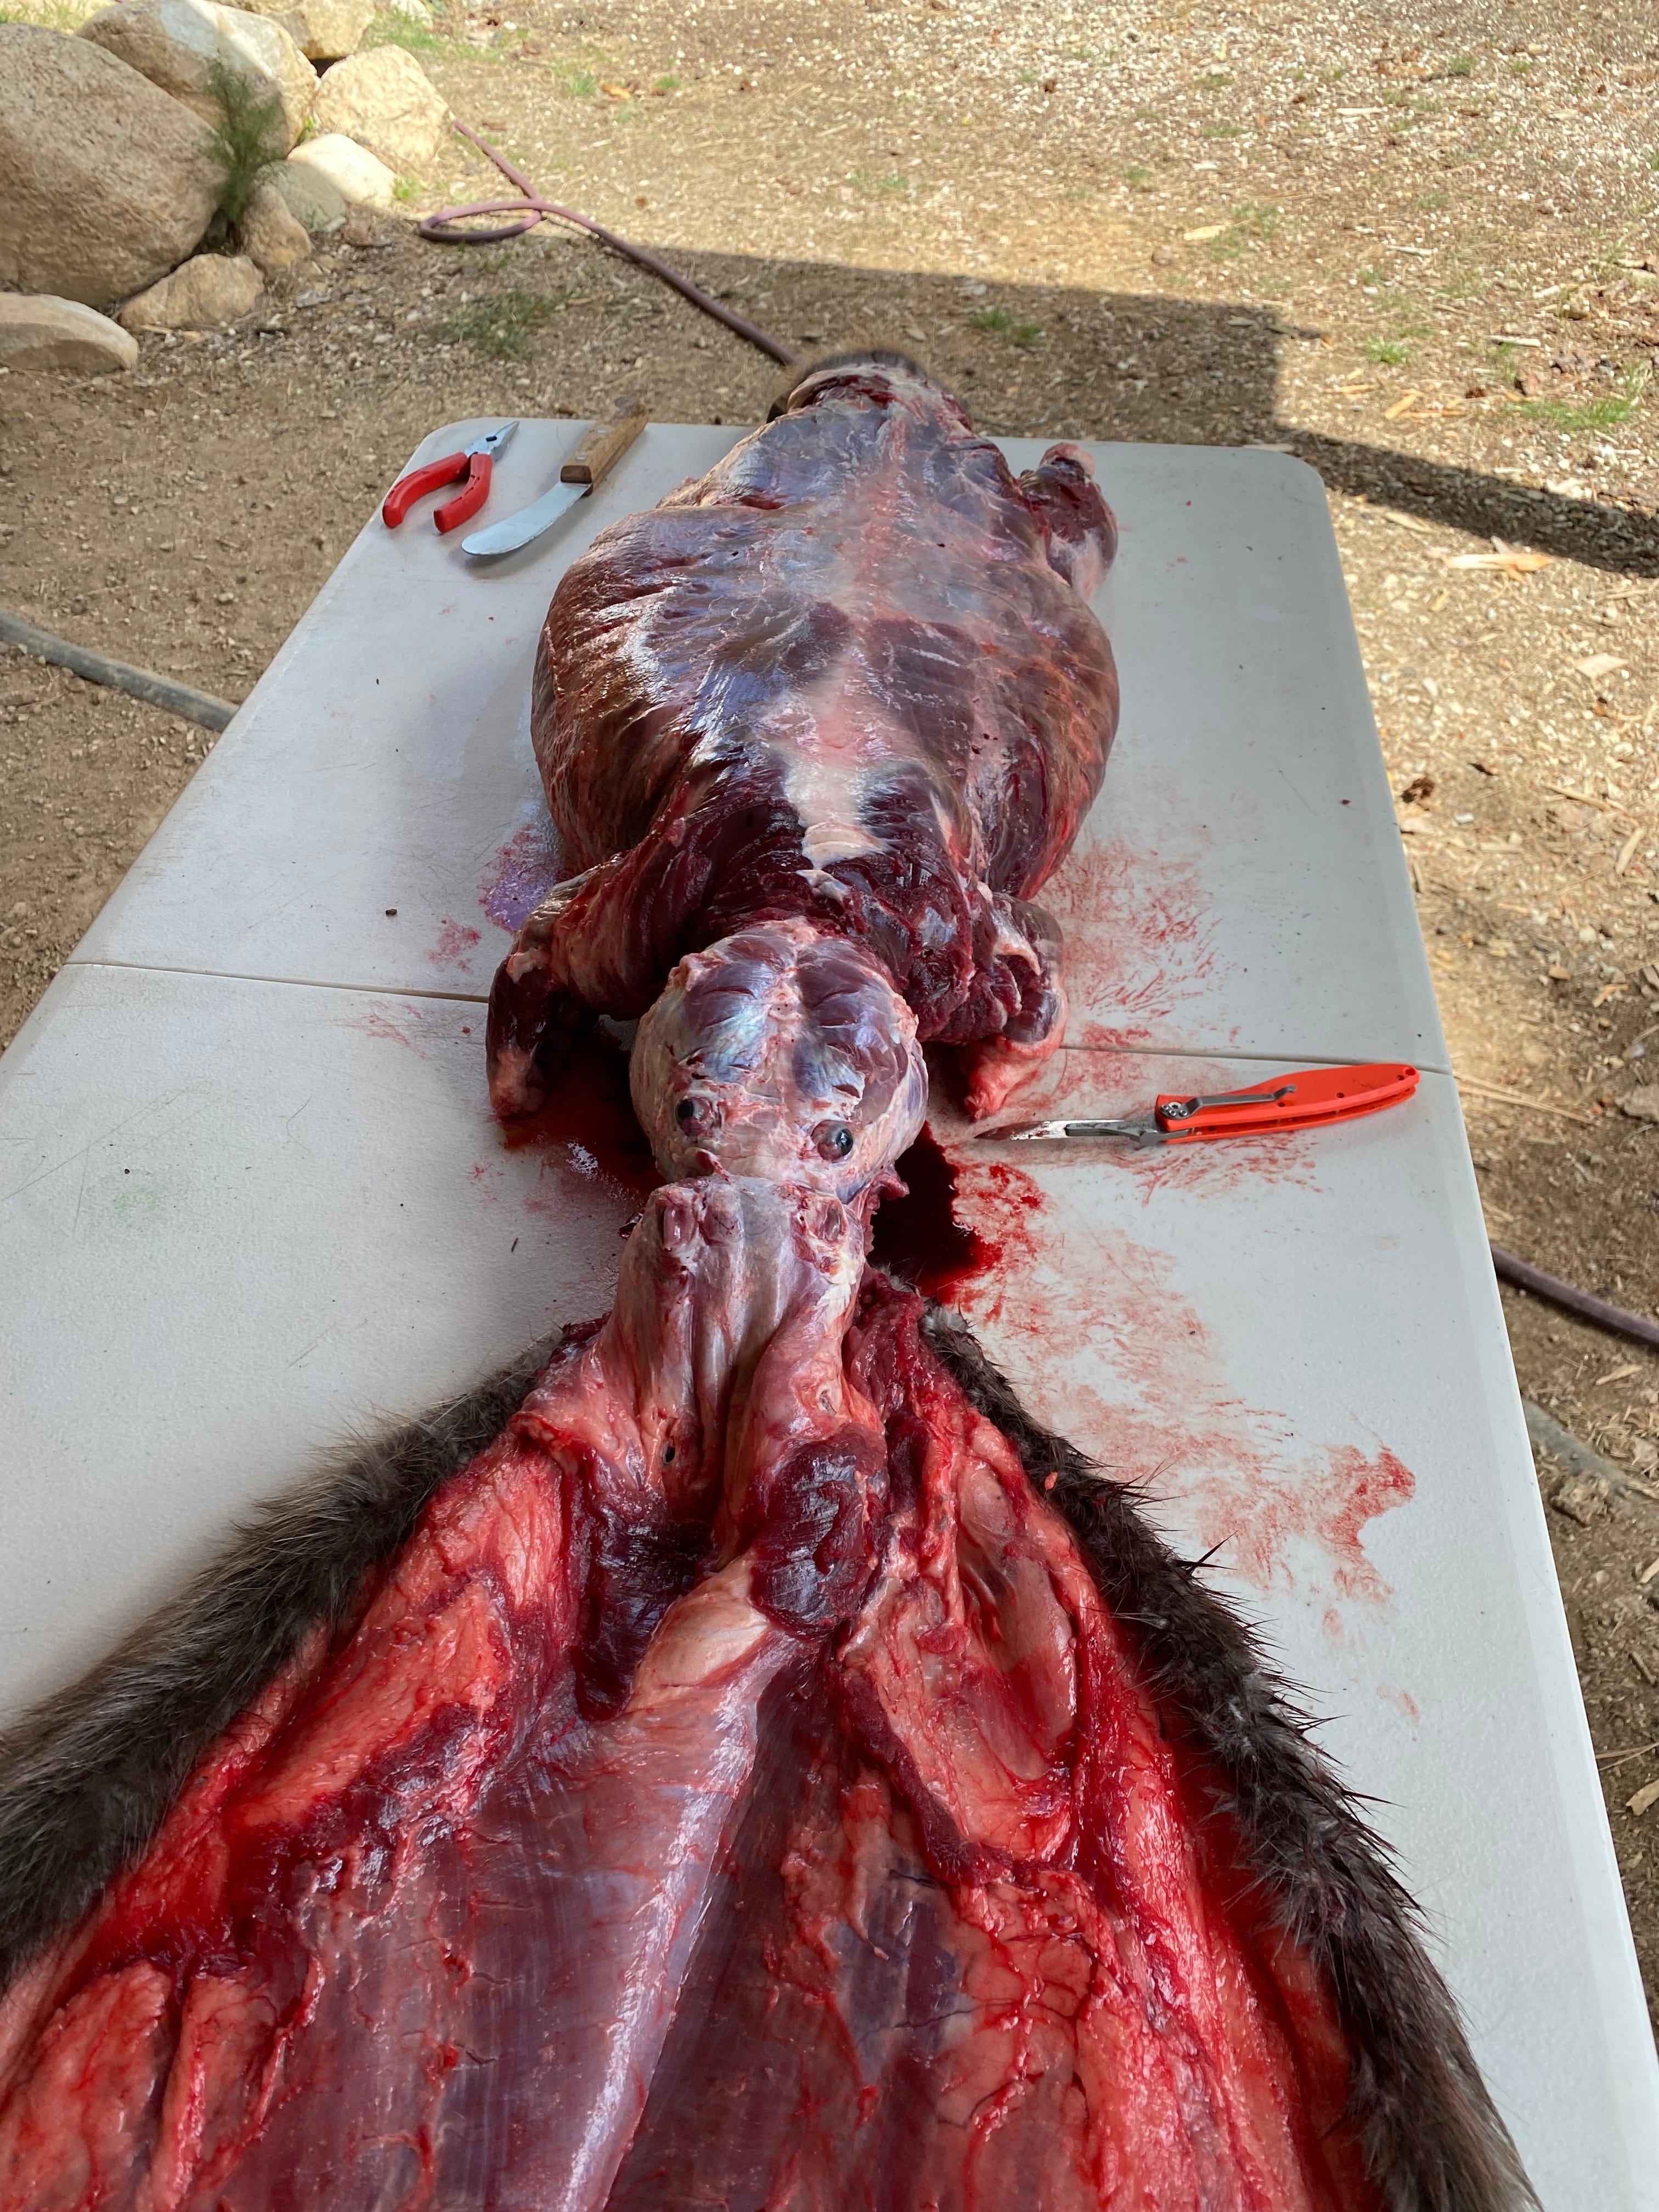
Beaver tail ready for the freezer. Will turn into wallet and watchbands later. REMOVE THE SKULL: This next part is one that makes some people shudder, but if you are wanting to take advantage of using the whole animal you need to remove the skull. Take a fine toothed saw and aim for the vertebrae nearest the skull. The first few slices will be easy until you hit bone. Be forewarned that you will likely hit the carotid arteries and will be in for a weeeee bit of blood pooling on your table. The reason remove the skulls is that I boil and bleach them to use as home decor or sell them to my local fur shop. Today, just like the tail, I ended up putting it in the freezer to process at a later date.

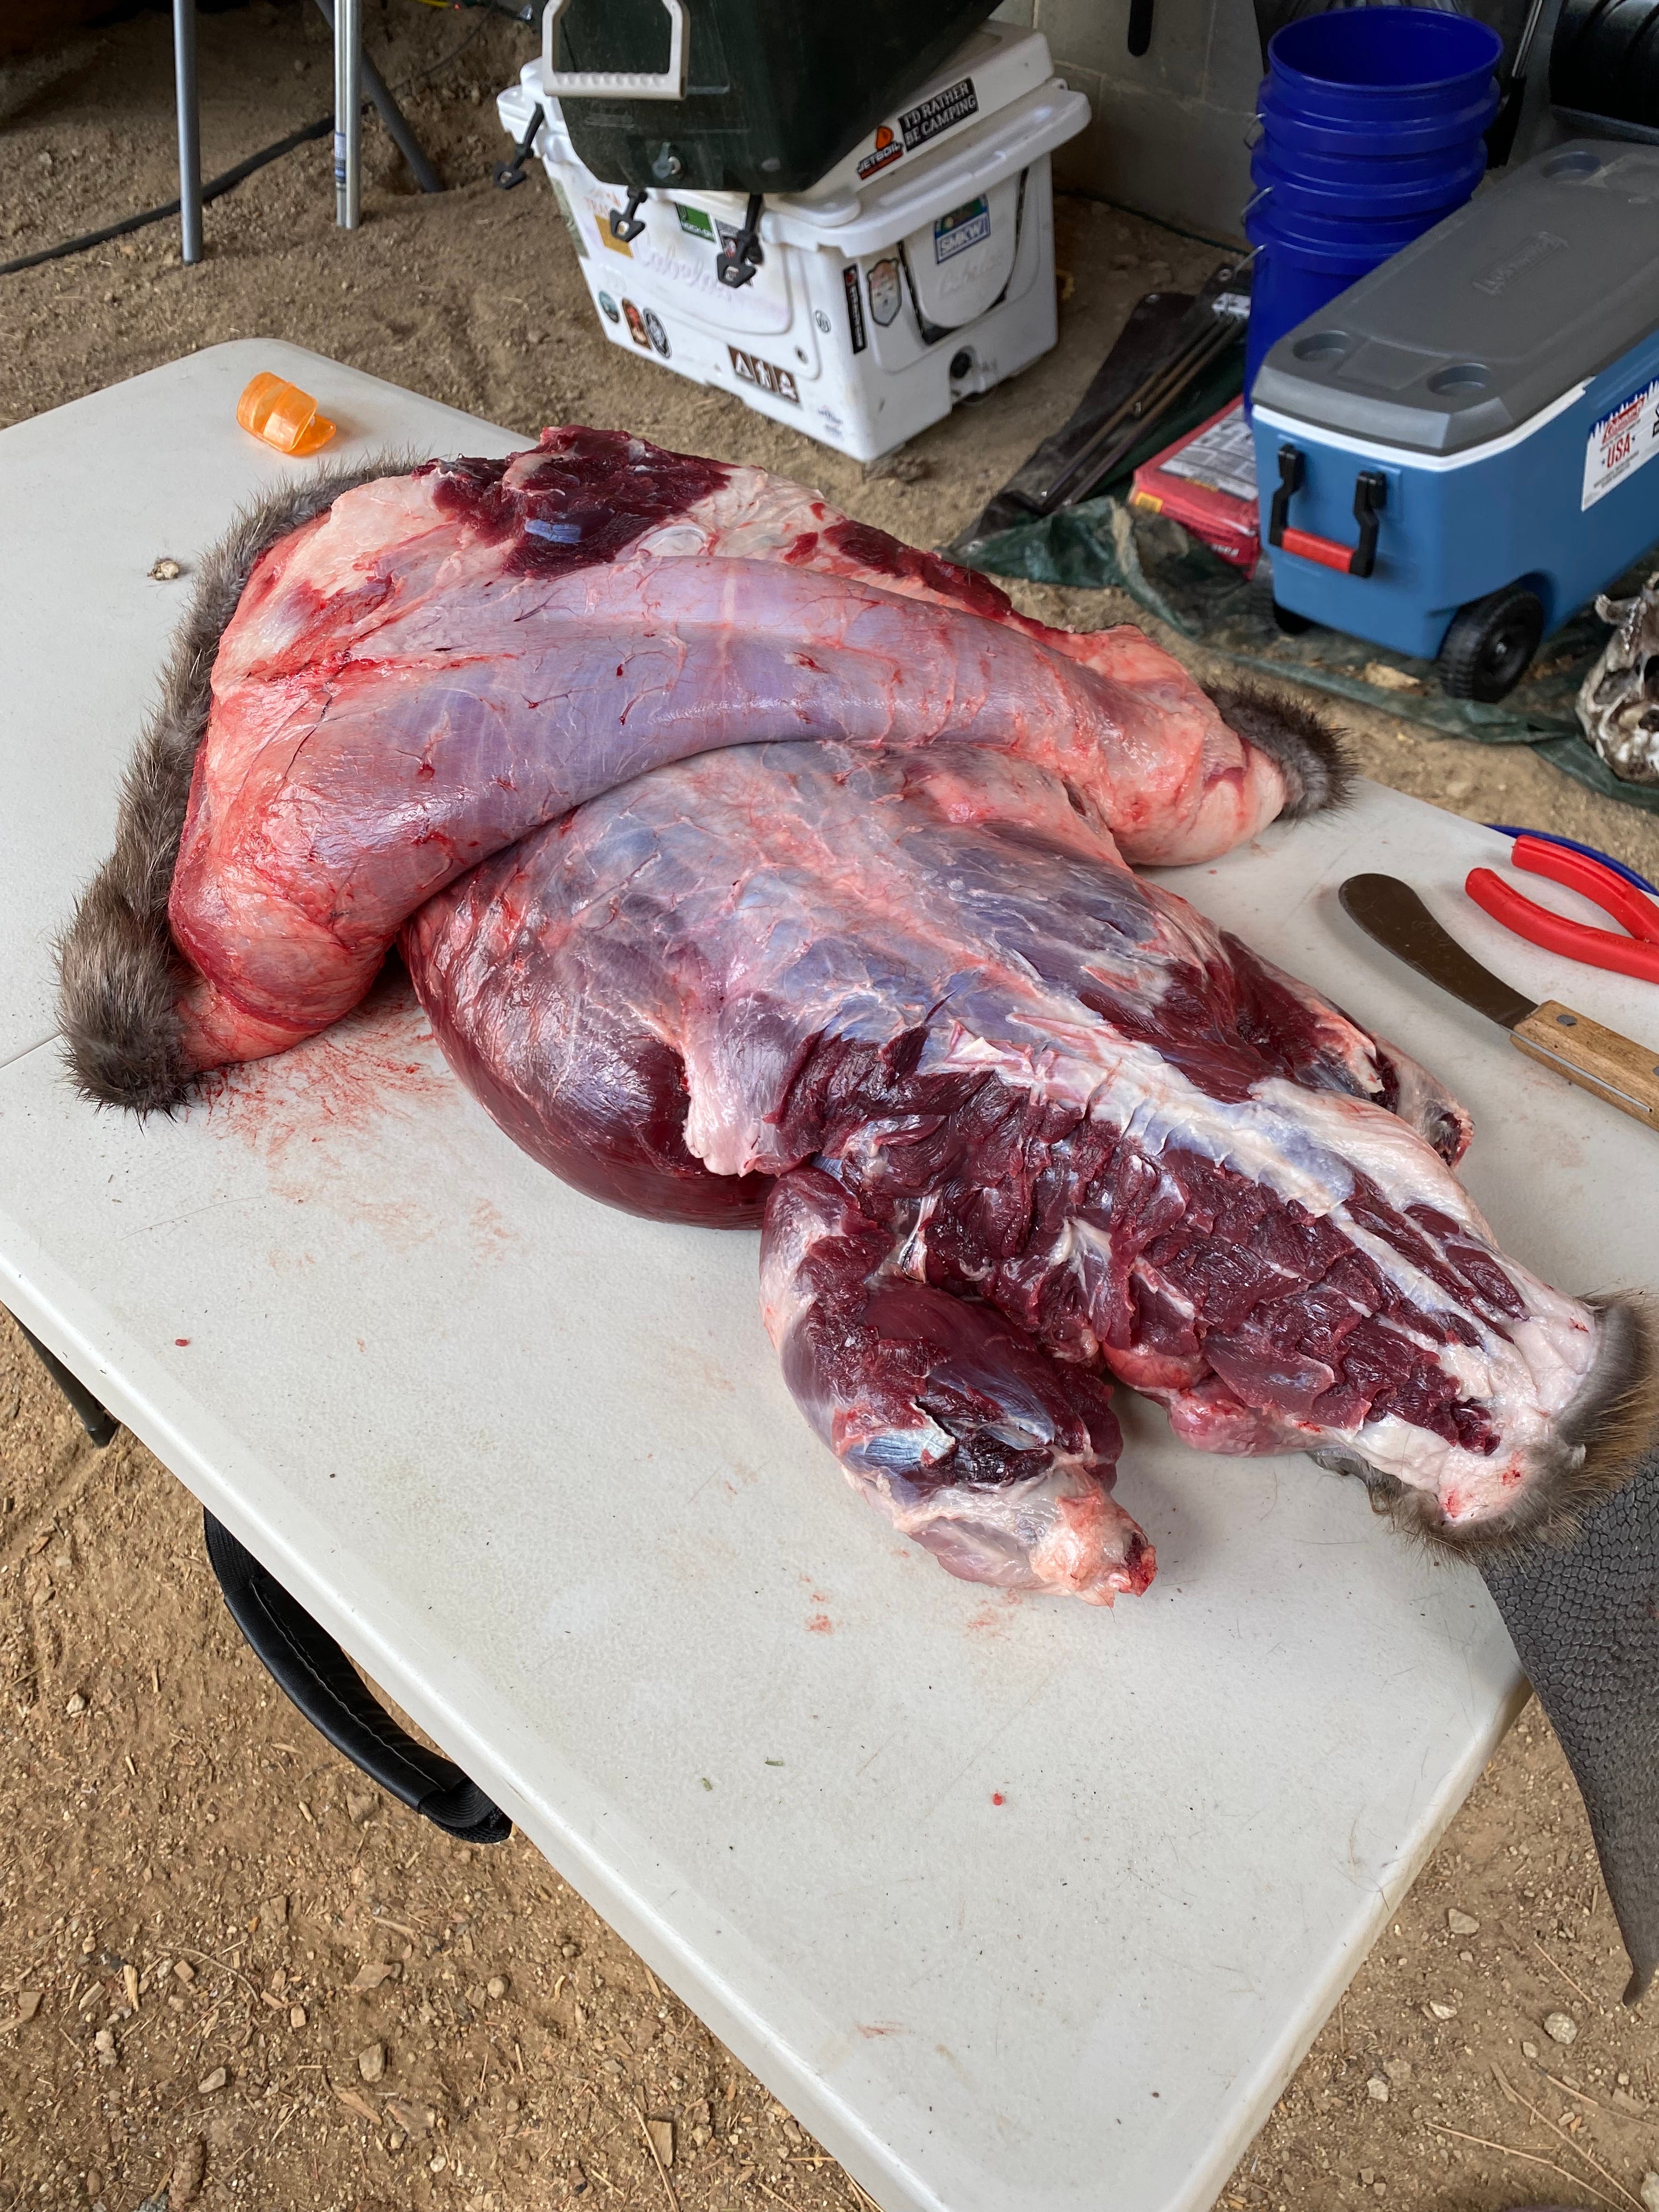
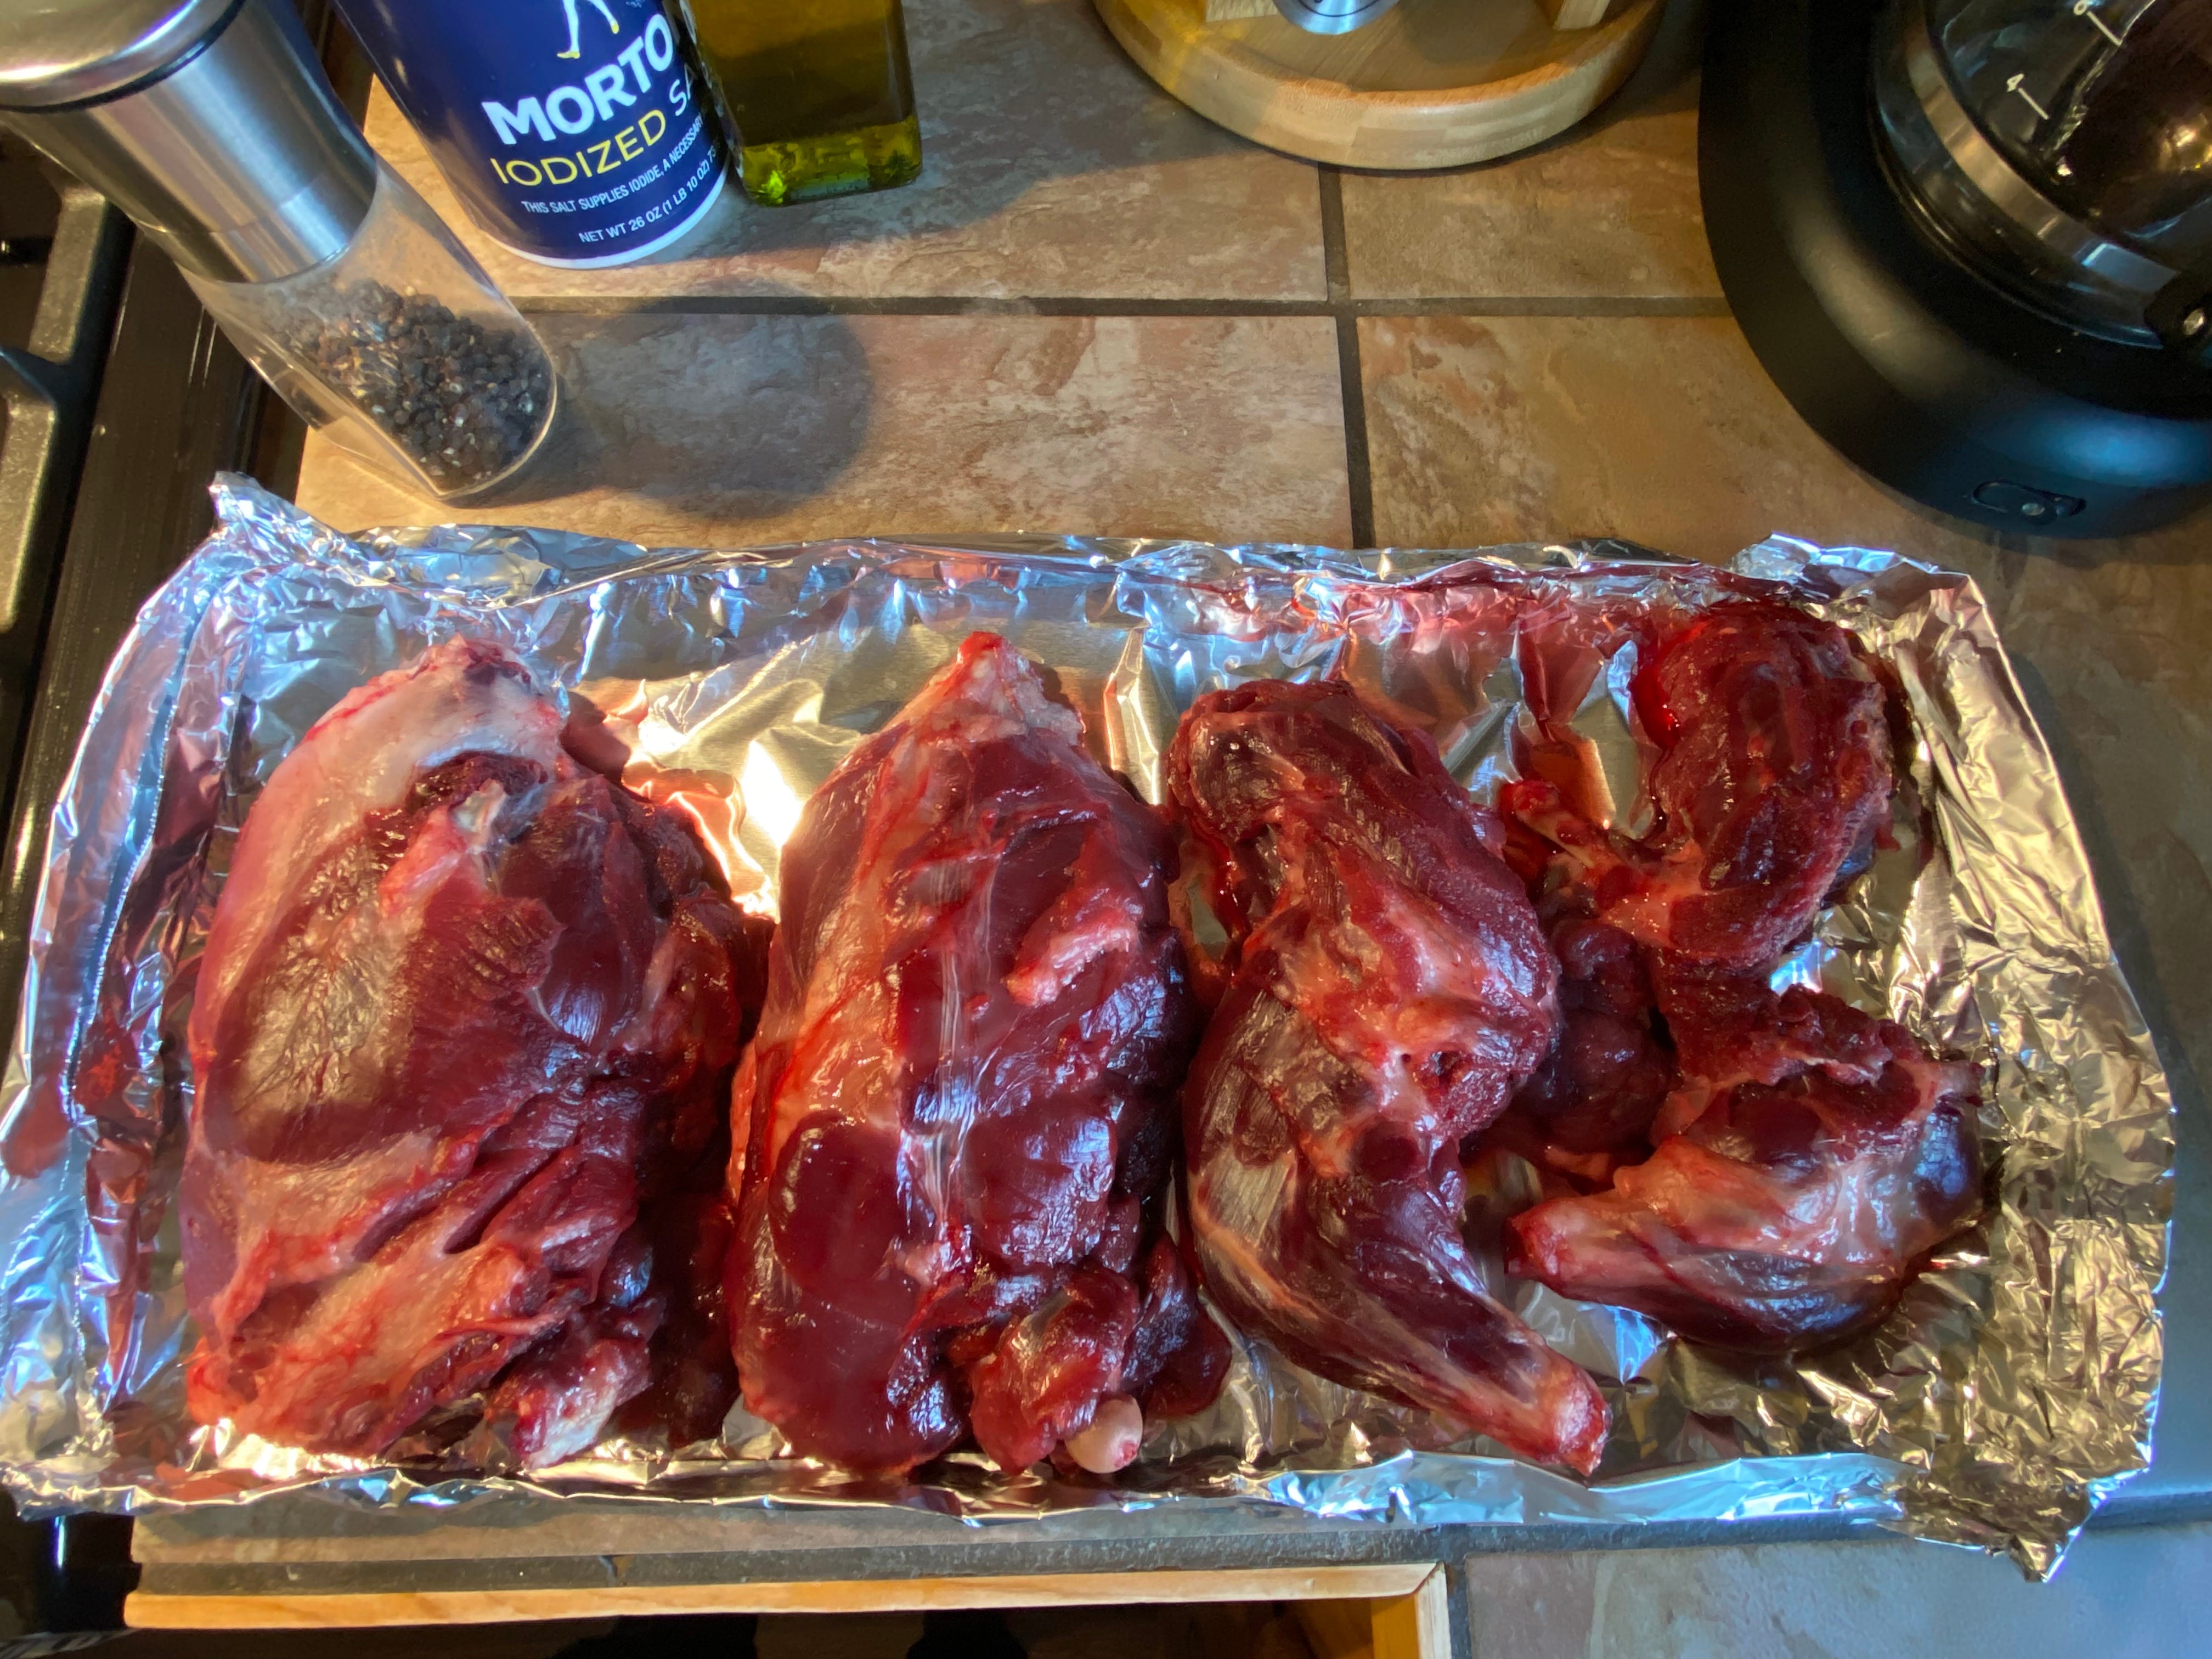
Skull ready to boiled and bleached. (Check out those teeth!) REMOVE THE MEAT: Once the skull and tail are removed, the next piece of the puzzle is to remove the front shoulders and rear thighs. If you have ever processed big game animals this is essentially the same thing. If you have never removed meat from an animal, it’s worth watching some youtube videos before you start. The front shoulders come off easily as the only thing attaching them is cartilage, but the rear thighs take some more finesse as you have to deal with a ball joint… Again, the more practice you get the better you will be at saving more and more meat.

Cleaned meat ready to get wrapped (or smoked). DOUBLE WRAP YOUR MEAT: Again, jokes aside, it is important to take care of your meat. I am incredibly fortunate to have my wife as a partner in crime in our backwoods adventure and she took over for me in cleaning and prepping the meat. Once she washed and trimmed the excess fat from the meat she wrapped each piece in saran wrap and squeezed out any remaining air. To help prevent freezer burn she then took each piece and wrapped it in butcher paper before labeling it and putting it into our freezer.
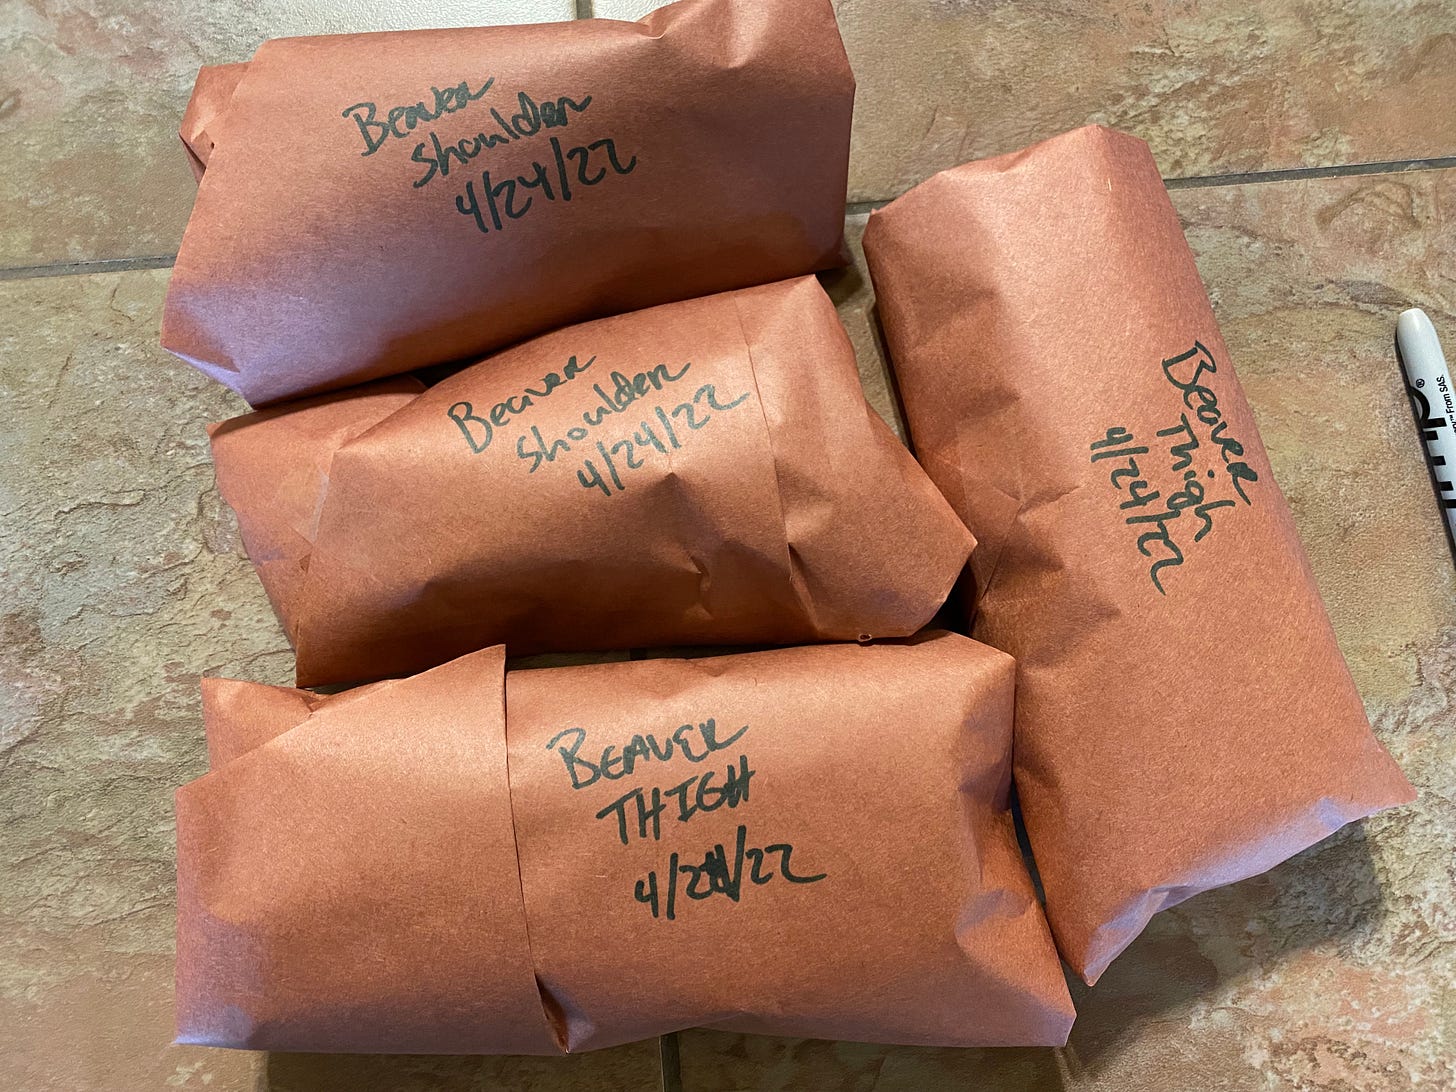
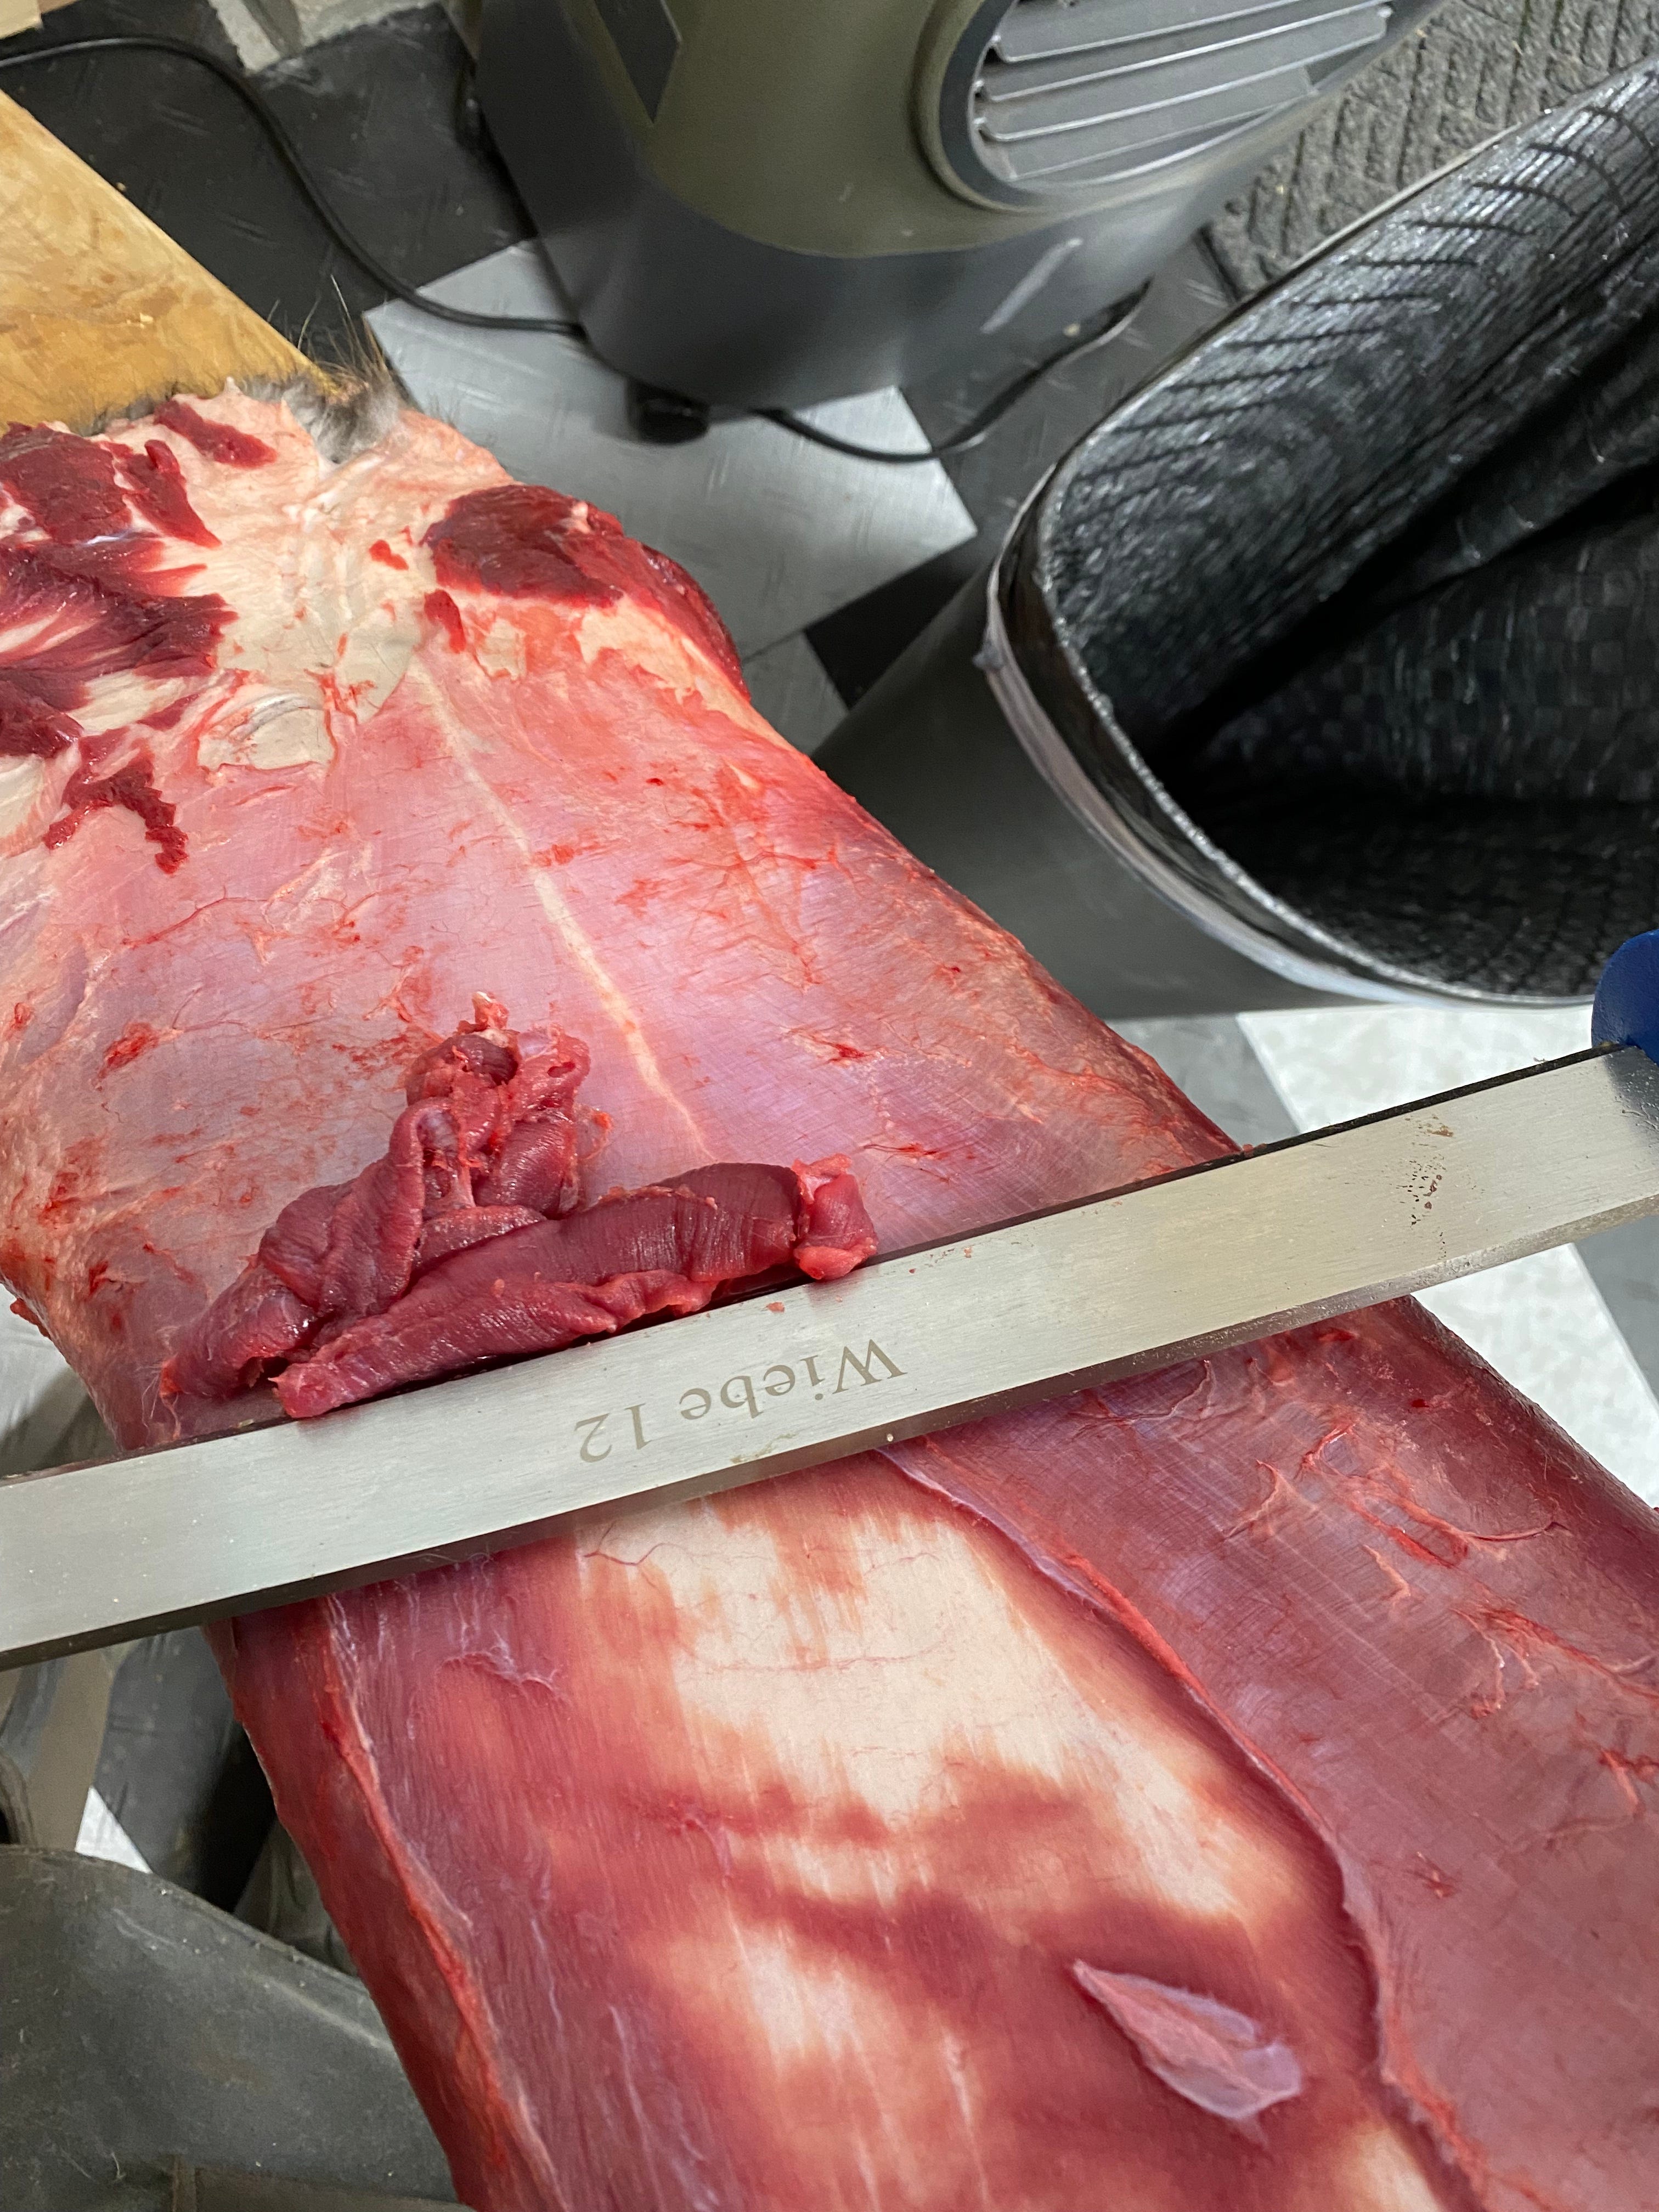
Organic meat ready for the freezer. FLESHING: With the meat taken care of and the carcass fully processed, it’s time to go back to the hide. The next step is to remove any remaining meat and fat that is still attached to the pelt. To do this, you need a hardwood board (usually called a fleshing beam) and a double-handled fleshing knife. You place your pelt with the fat-side facing up on your board and begin to run your knife down the pelt to remove any remaining fat or meat. To keep your pelt from moving I have found that using clamps really helps to give you more leverage (see photo below). Though this looks easy, this is the most time consuming step and often leaves new trappers with hole-filled pelts. The key is to go slowly until you get a technique down that works for you.
Using clamps to hold the hide in place on the fleshing beam. 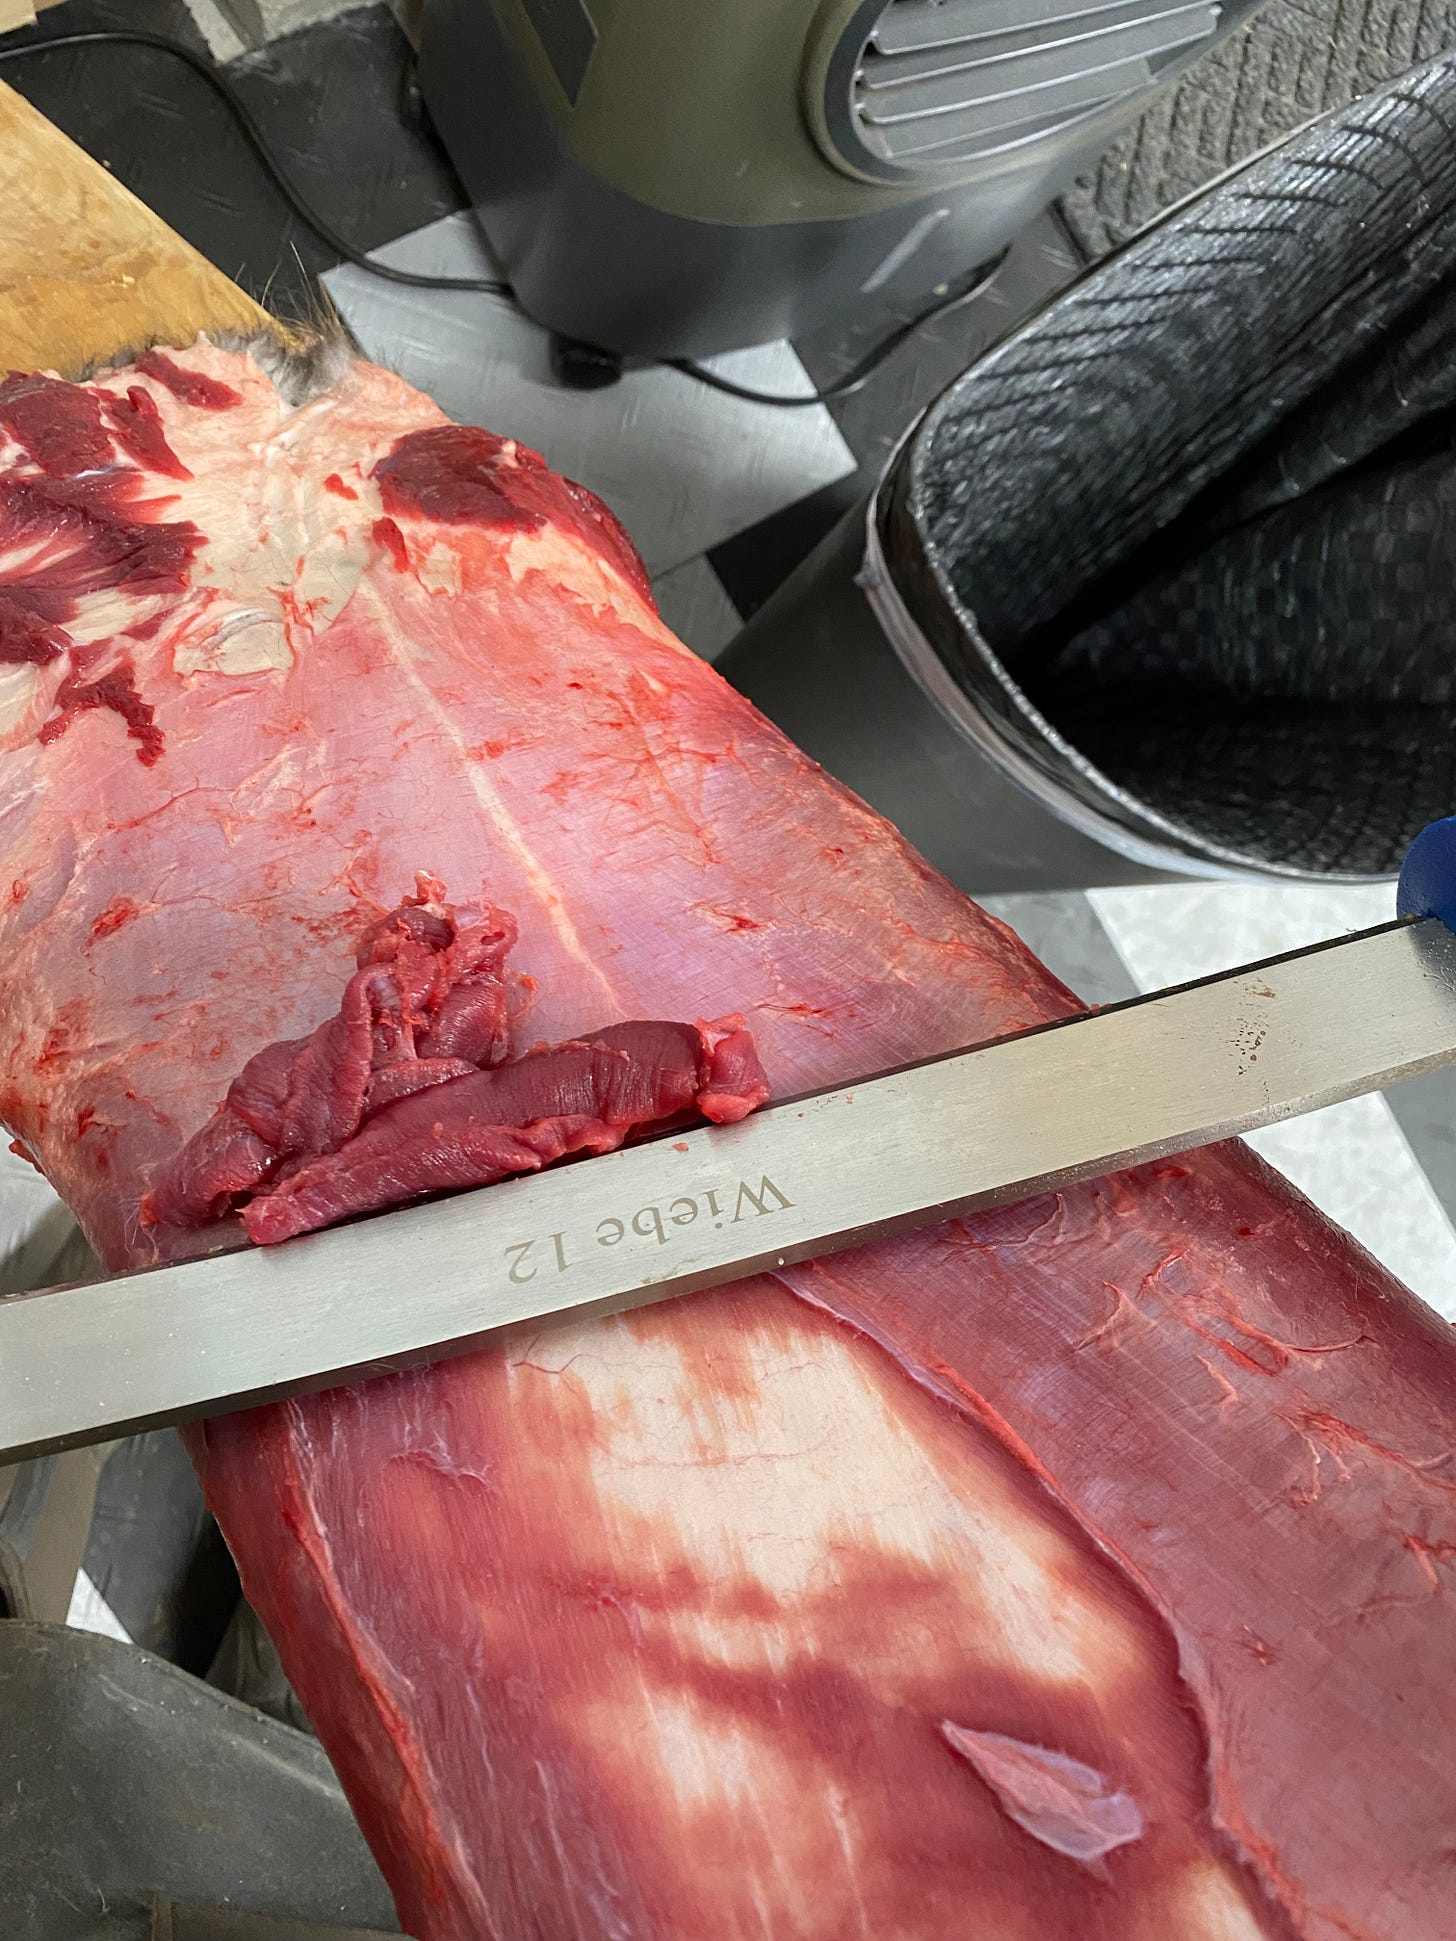
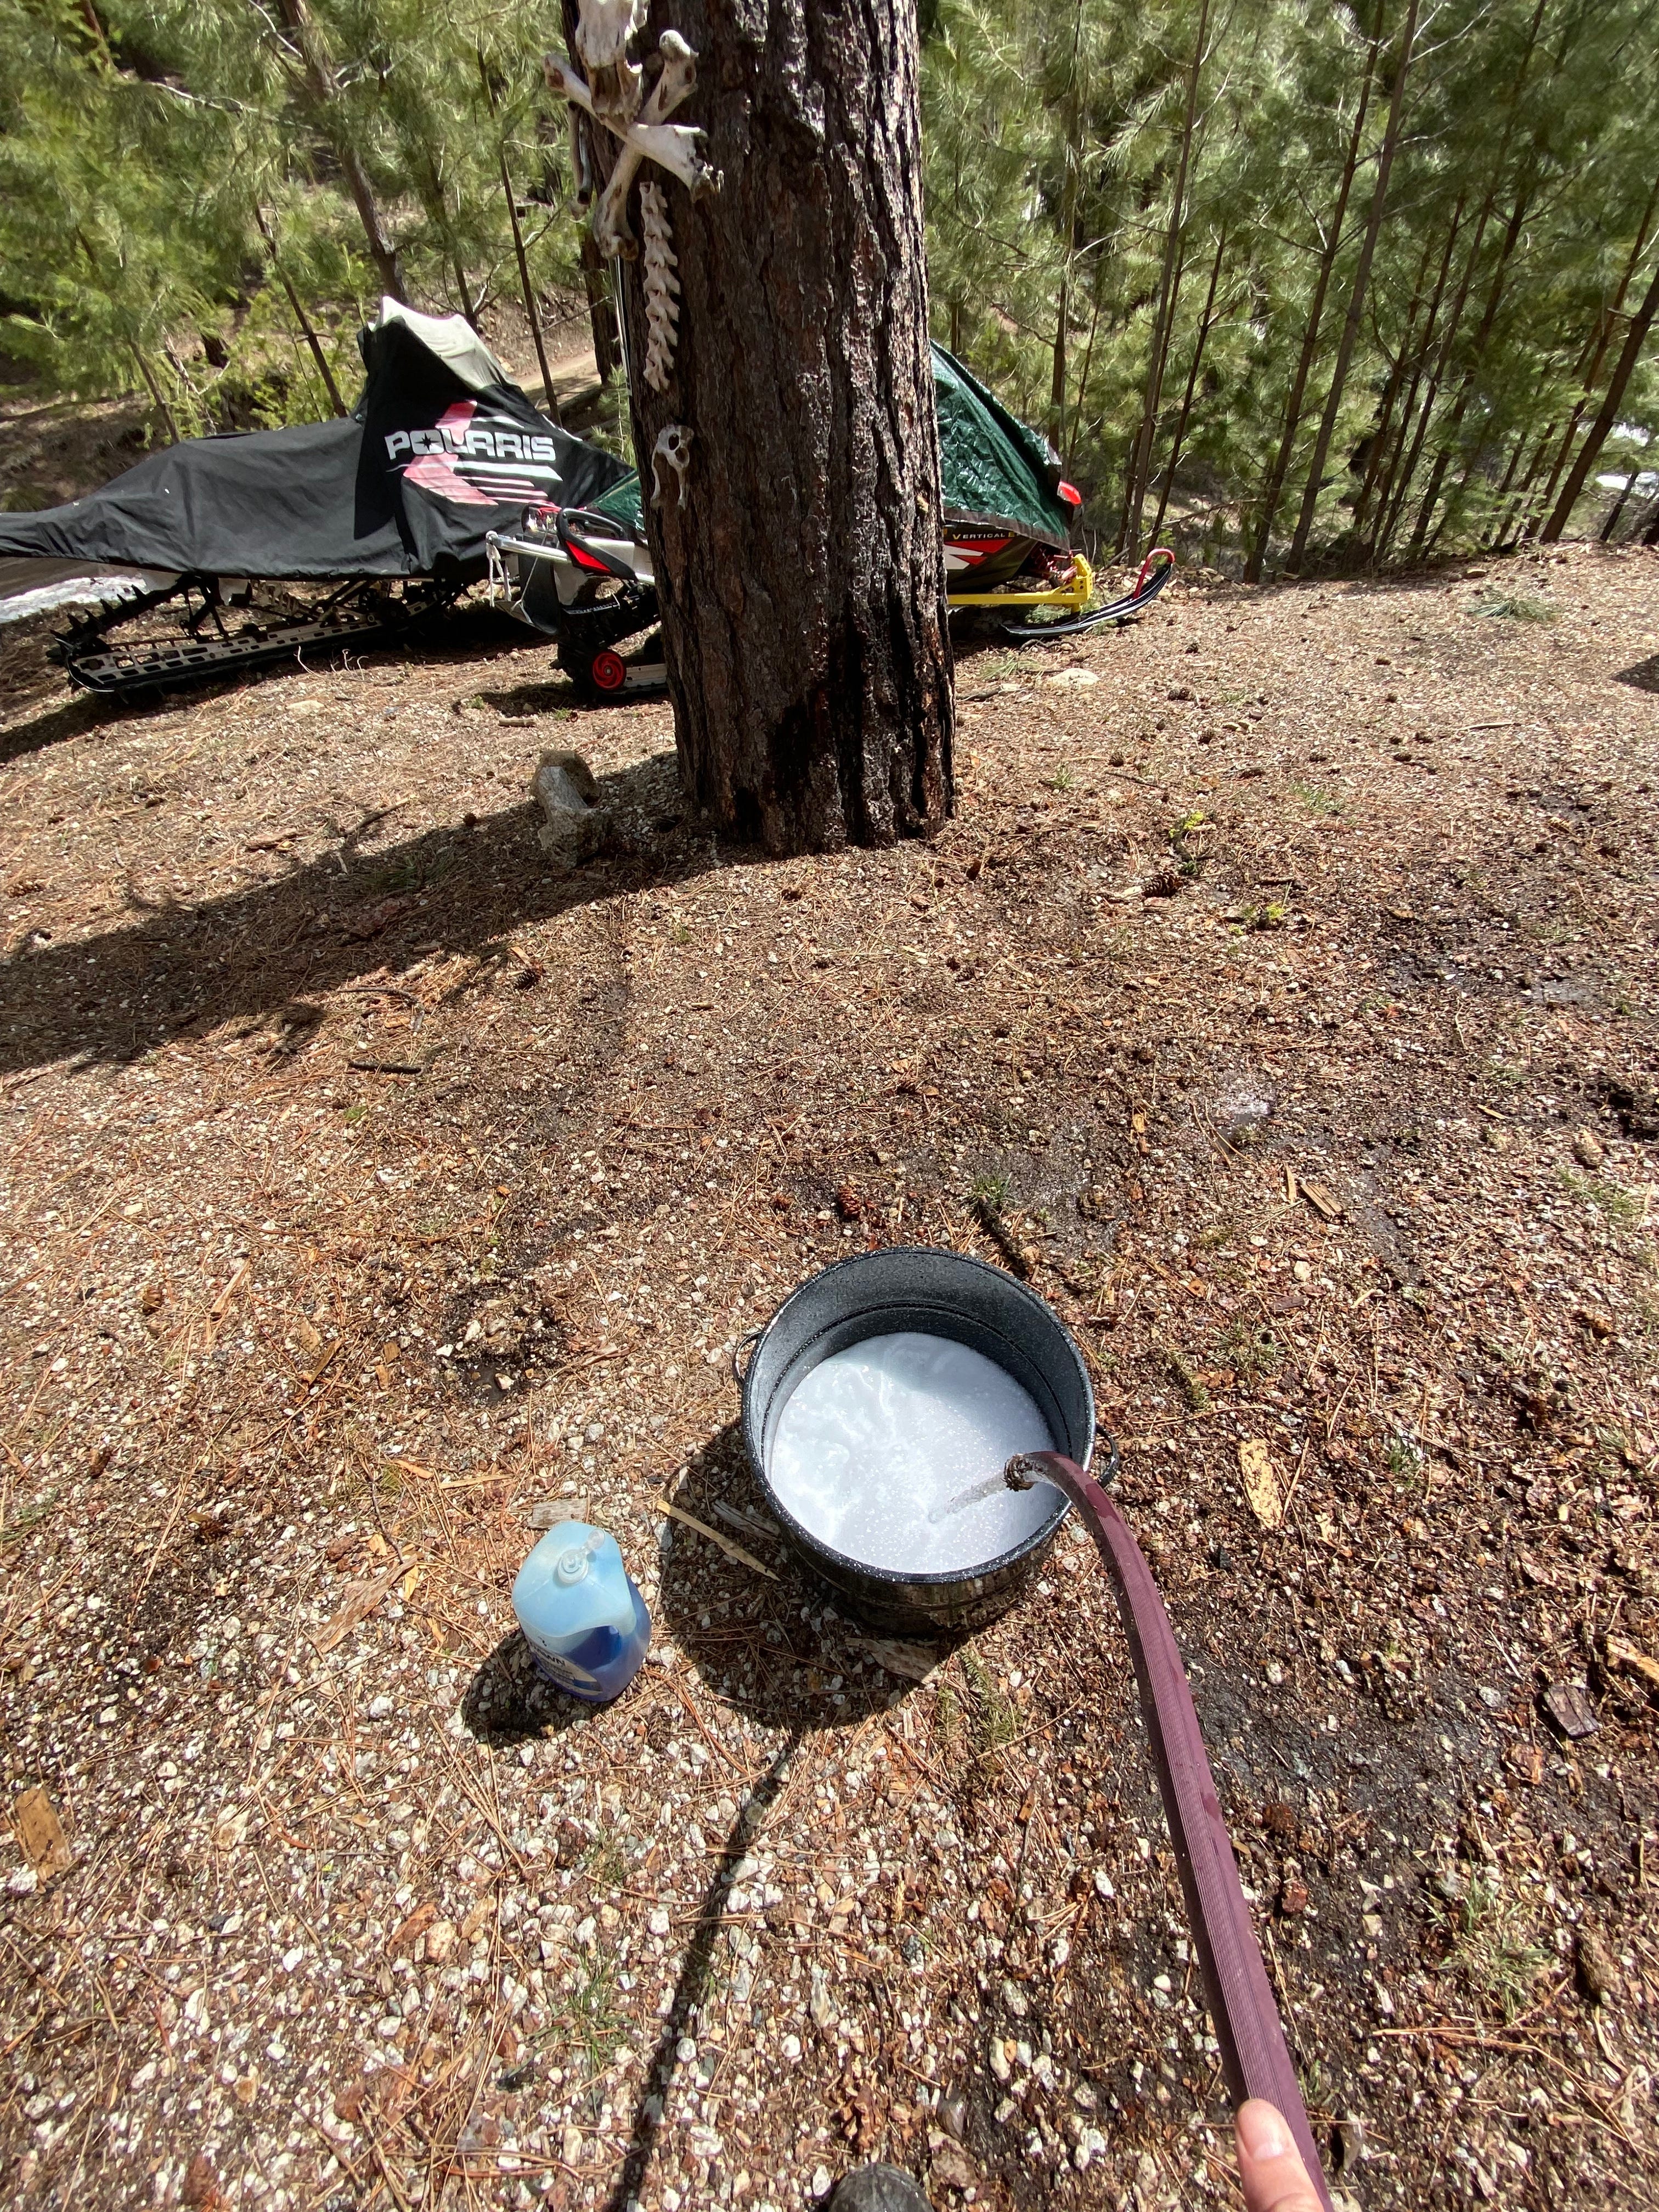
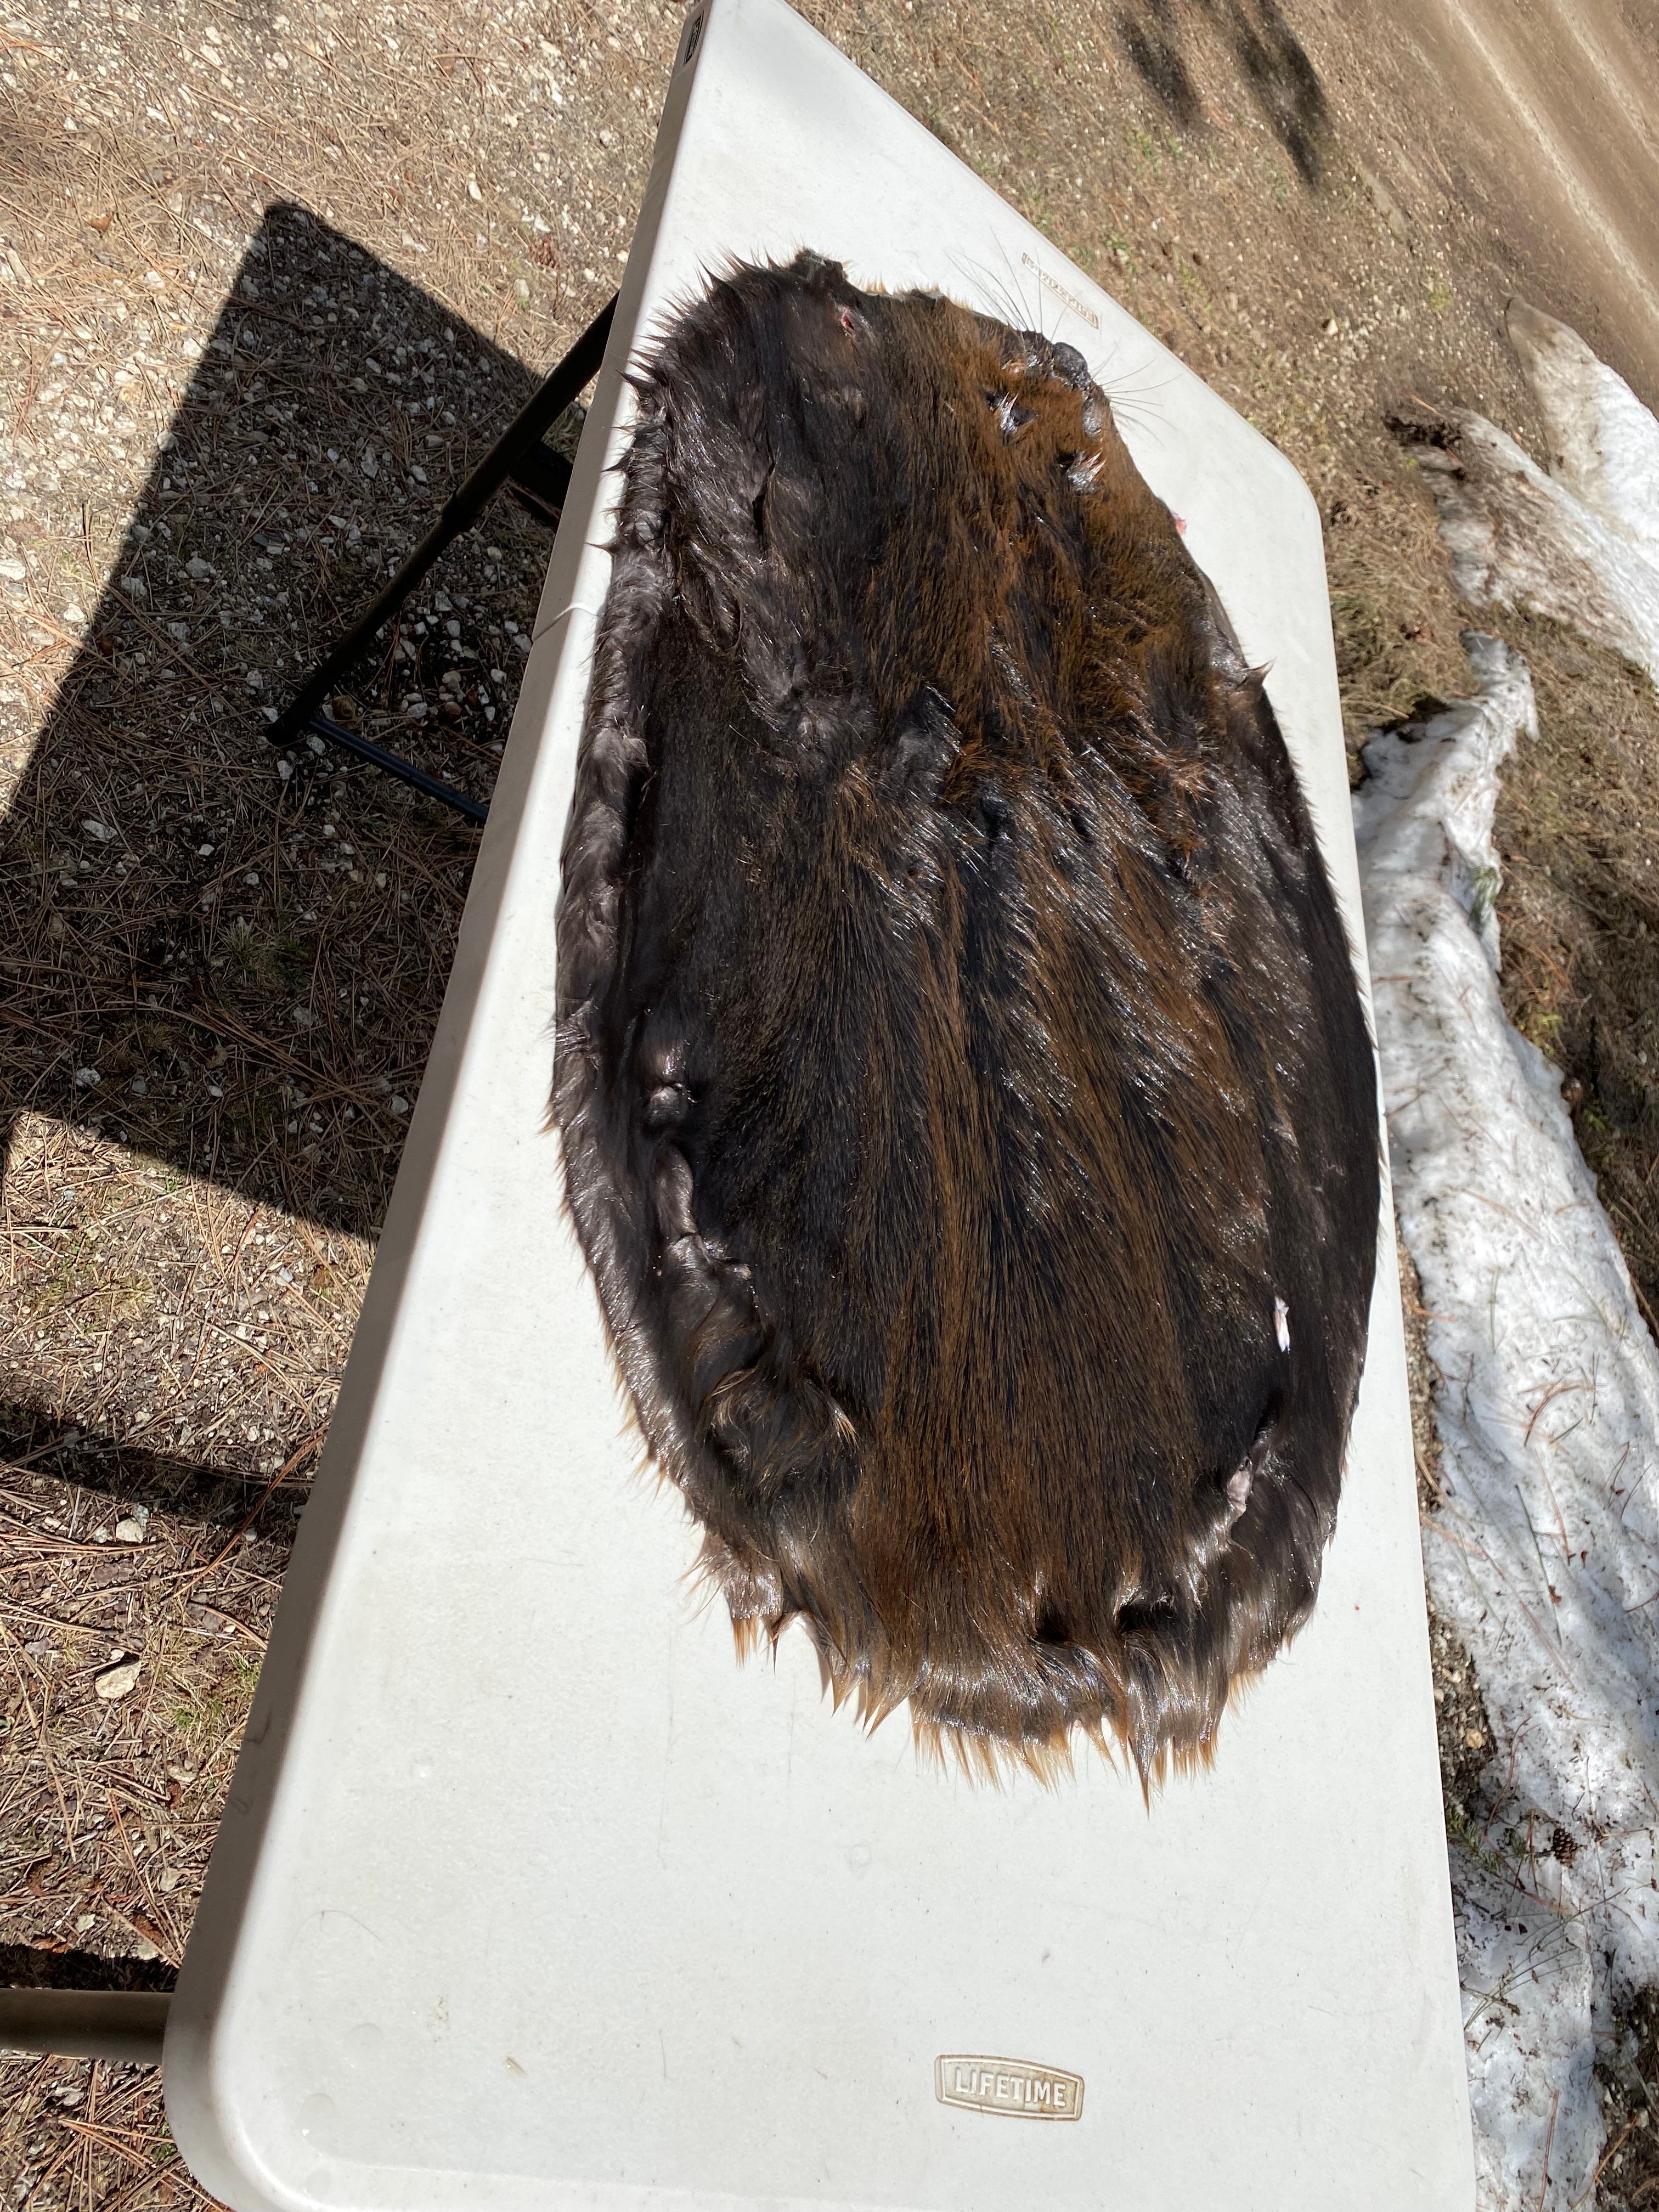
Using a fleshing knife to remove fat and meat to get to the ‘white.’ BATH TIME: Now that you have a fully fleshed hide it’s time to wash your hide in water and dawn dish soap. Fully submerge your hide and agitate it with your hands and ensure that all debris which may be hiding on the fur side is let loose. Once done, you can wash your hide with a garden hose to remove any remaining soap. On this particular day I laid my hide out in the sun to dry a bit before moving it to the final stage of hooping.
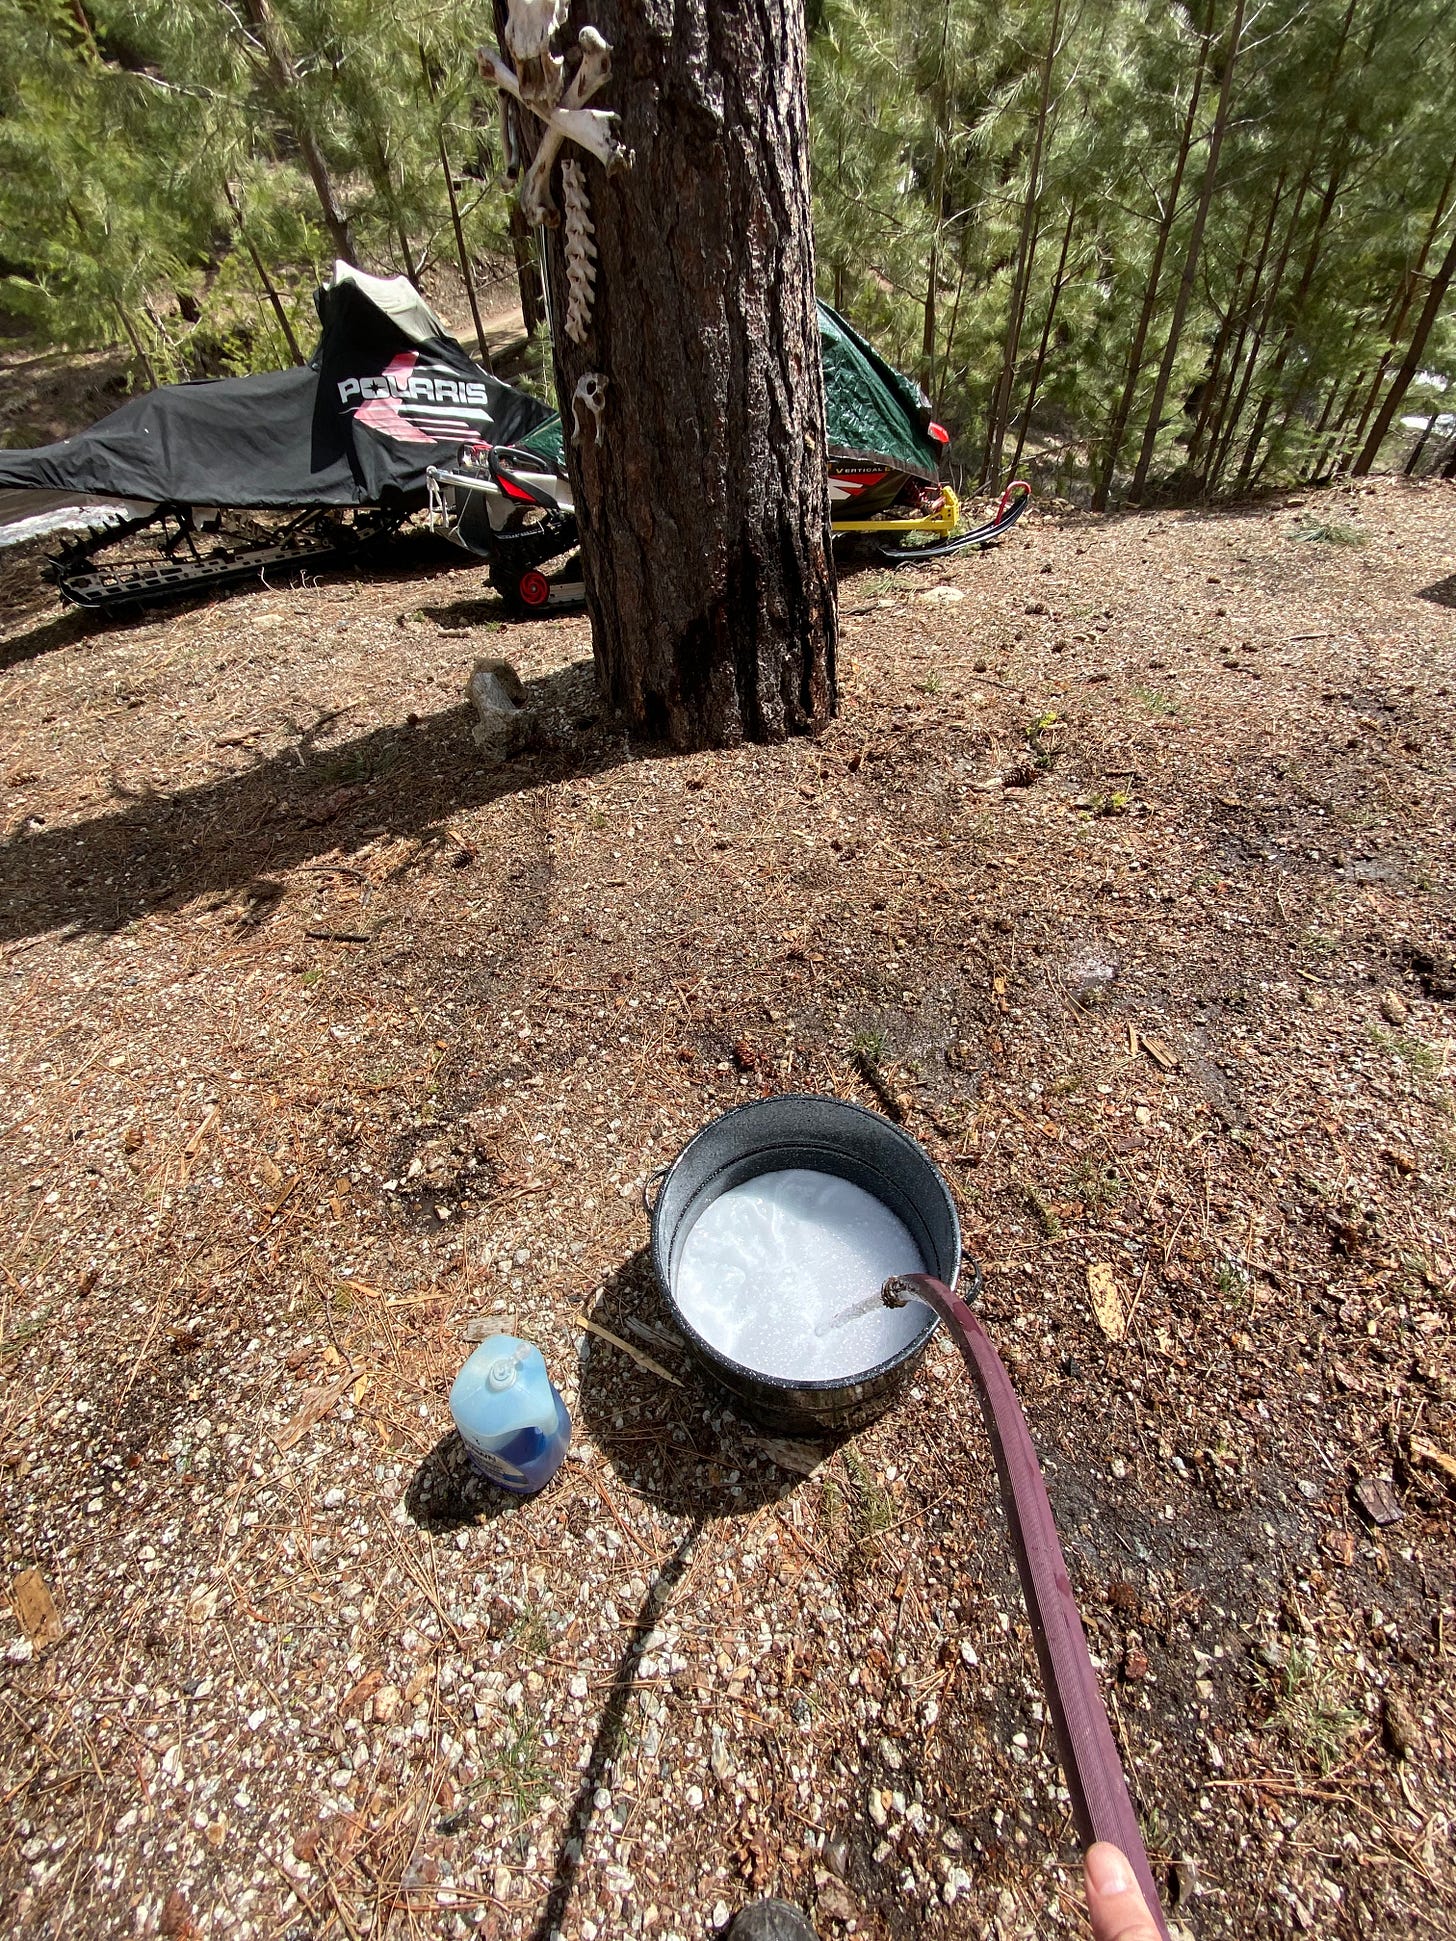
Dawn Dish Soap and Water — The Magic Formula. 
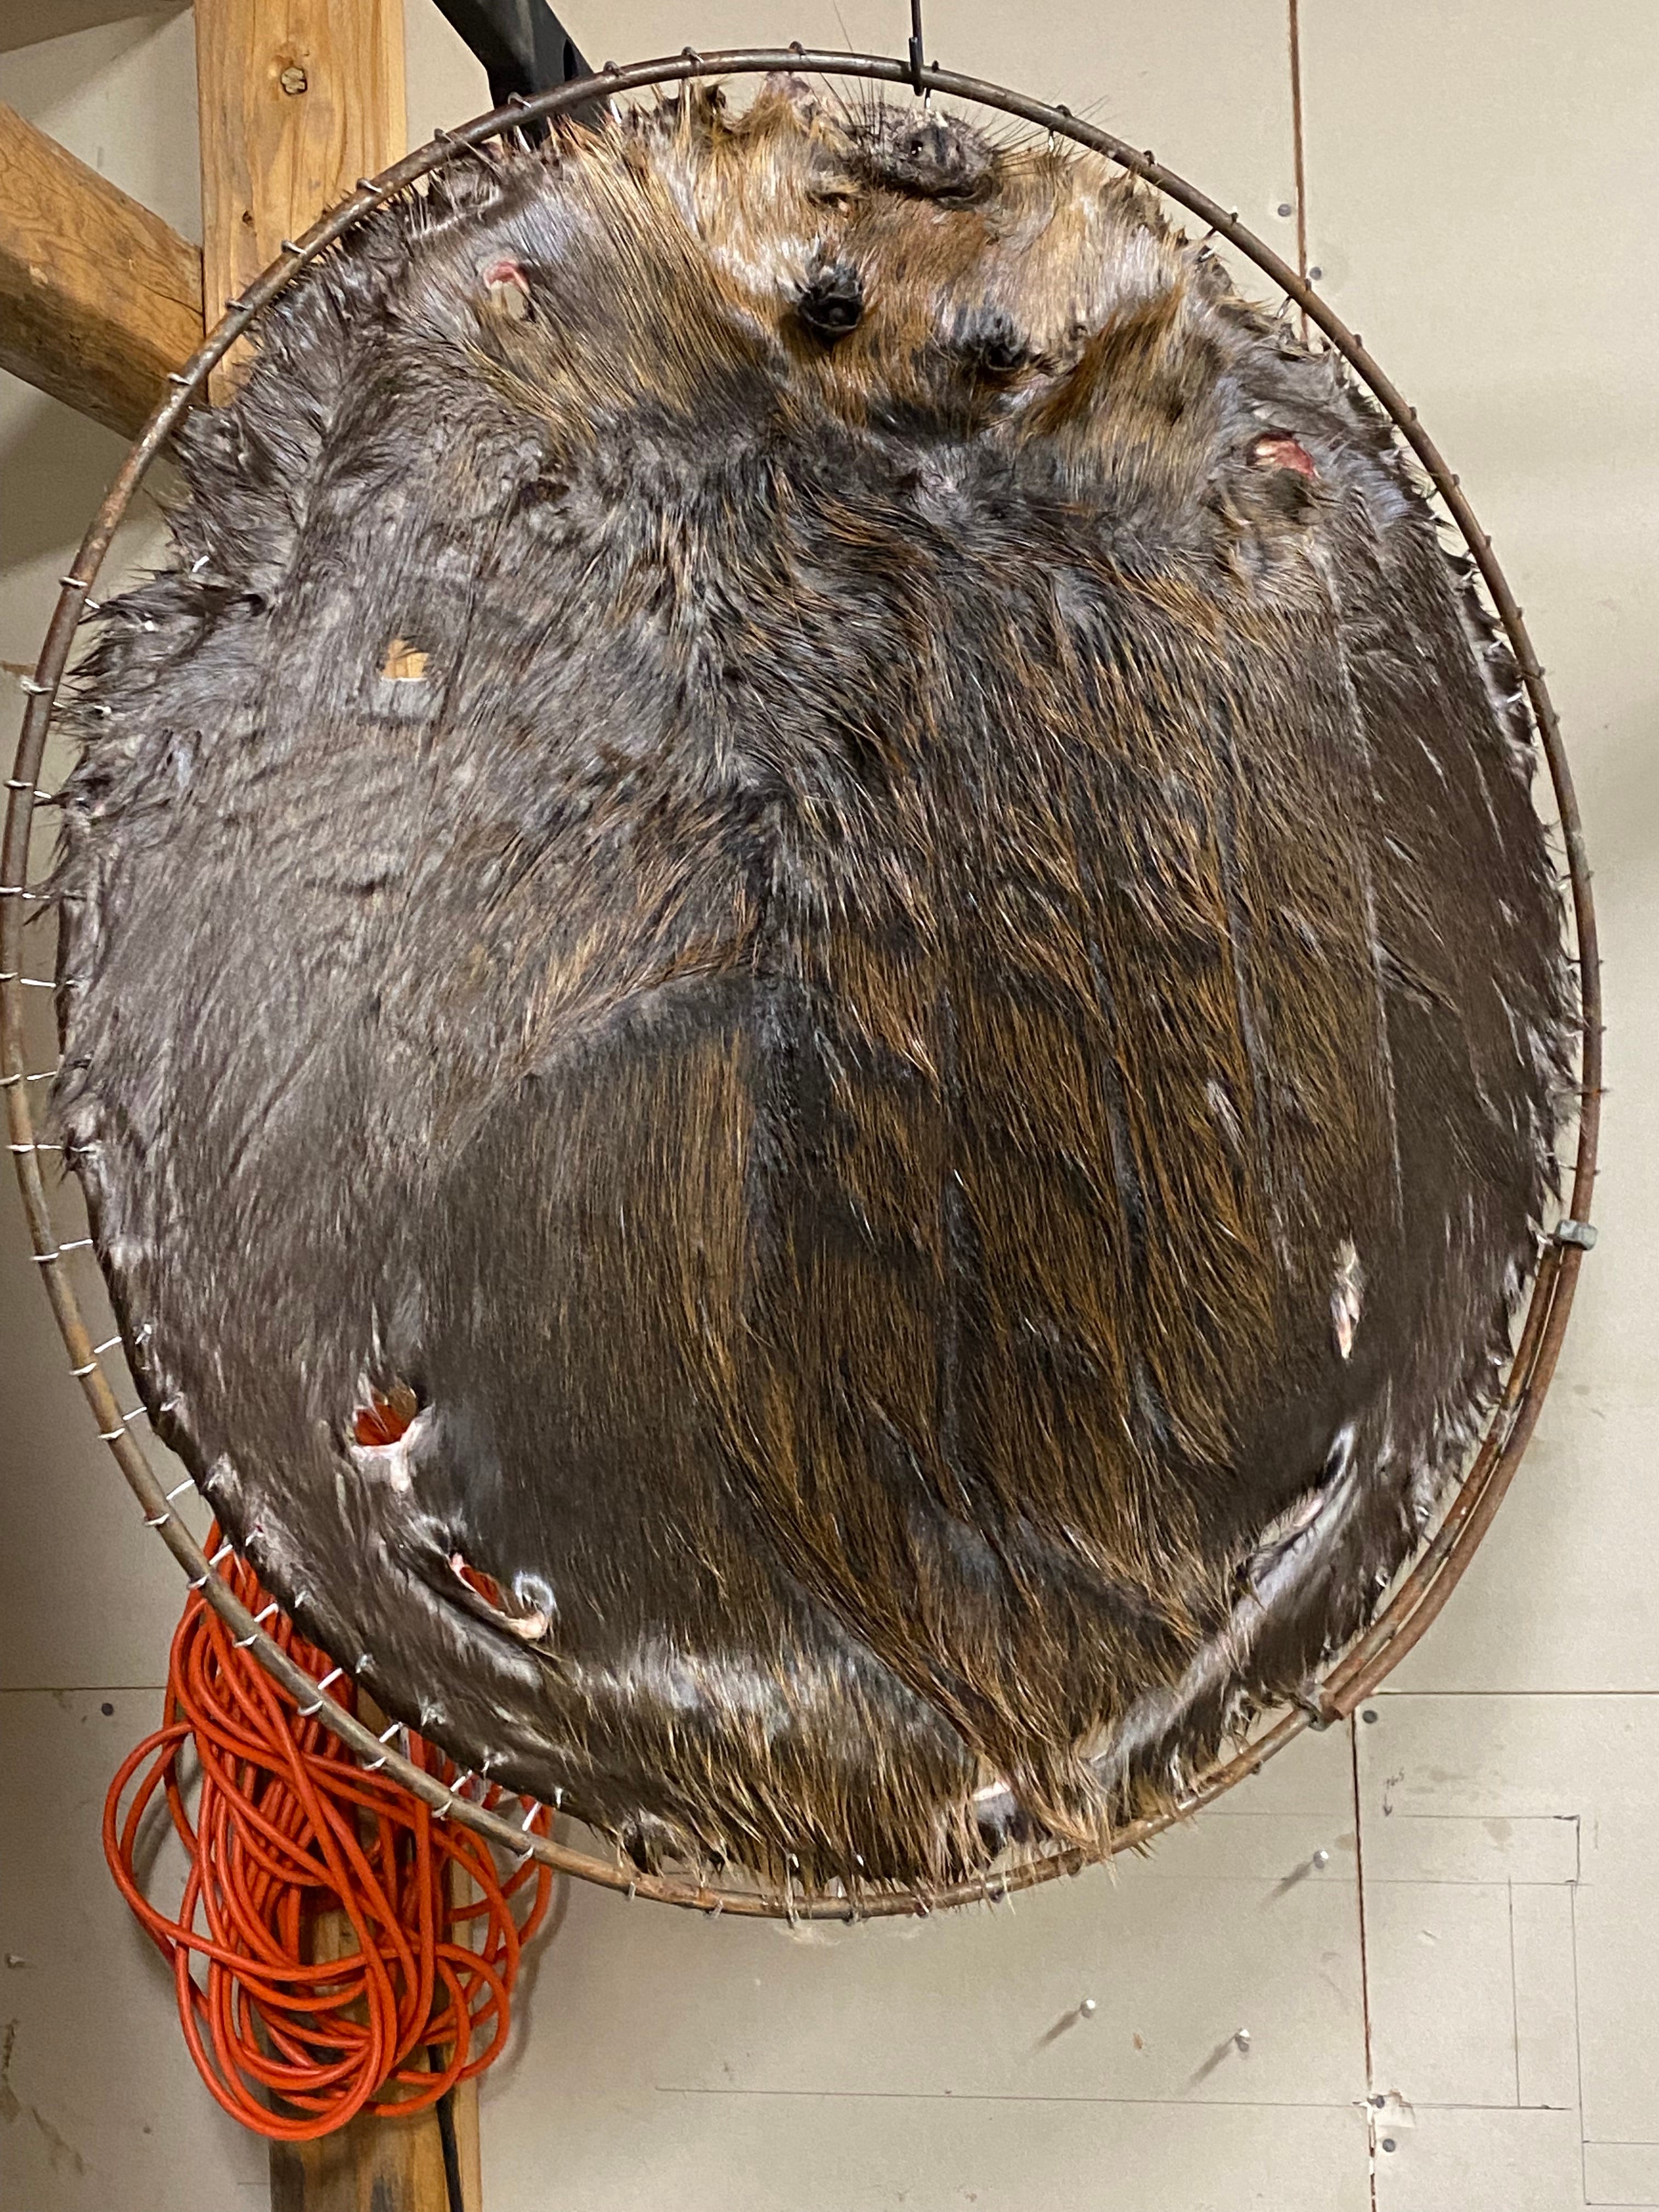
Cleaned pelt air drying in the sun. HOOP YOUR BEAVER: The last step is to hang your beaver out to dry. To do this in a way that creates the perfect circle that fur buyers require, you need to place your beaver hide on a metal hoop. Thankfully, my wife was able to help me here and she used a leather punch to put holes around the outside of the hide about one inch a part around the entire circumference. Once she had the whole hide attached to the metal ring with small metal c-clamps, we extended the ring until the hide was pulled taught. The hide will hang like this for several days until it is fully dry. At that point the hide is eligible for sale, or in our case, it will be ready to go through a tanning process and then turned into a blanket, moccasins, or some other cool clothing item that we will use during the winter months.

My wife hooping our nuisance beaver. 
Beaver pelt hanging to dry for several days before tanning.